Introduction
Defining "Good Seamanship" is not easy. There are no examples of it because if a skipper is applying good seamanship, nothing goes wrong! I could give you a hundred examples of bad seamanship!
Some of the virtues required for good seamanship are; planning, forethought, consideration for others, knowledge and lots of experience. The sure way of gaining all this is to use lots of bad seamanship. Learn from your mistakes or preferably other people’s!
There is a general misconception that "boating is easy; anyone can do it". That’s almost true. Anyone can do it; badly and dangerously!
In this module we will cover,
- Yacht form and stability
- Rigging and sails
- Anchors and mooring
- Safety equipment
- Distress situations (GMDSS, DSC radios, Epirb's etc)
- Fog safety including sound signals
STABILITY
All boats are dangerous, even large ships sink! We take a risk when we take a
tiny craft like a yacht to sea. There are many factors which can affect that
risk and one is the vessel's stability.
A stable boat will return to an upright position after being "tipped" by wind, sea, or movement of cargo or crew. This force trying to right the boat is governed by various things.
- Mass of the vessel. The heavier the boat, the more force is needed
to tip her over.
- Centre of Gravity. (CG) This is the force that makes a doubledecker bus fall over when cornering at a slower speed than a car. the bus has more weight higher up in proportion to its overall weight. (Gravity is a downwards force)
- Centre of Buoyancy. (CB) This is more difficult to describe, but it is the position of the centre of the volume of water displaced. This centre of Buoyancy moves as the boat is heeled, acting against the force trying to tip her over. (Buoyancy is an upwards force)
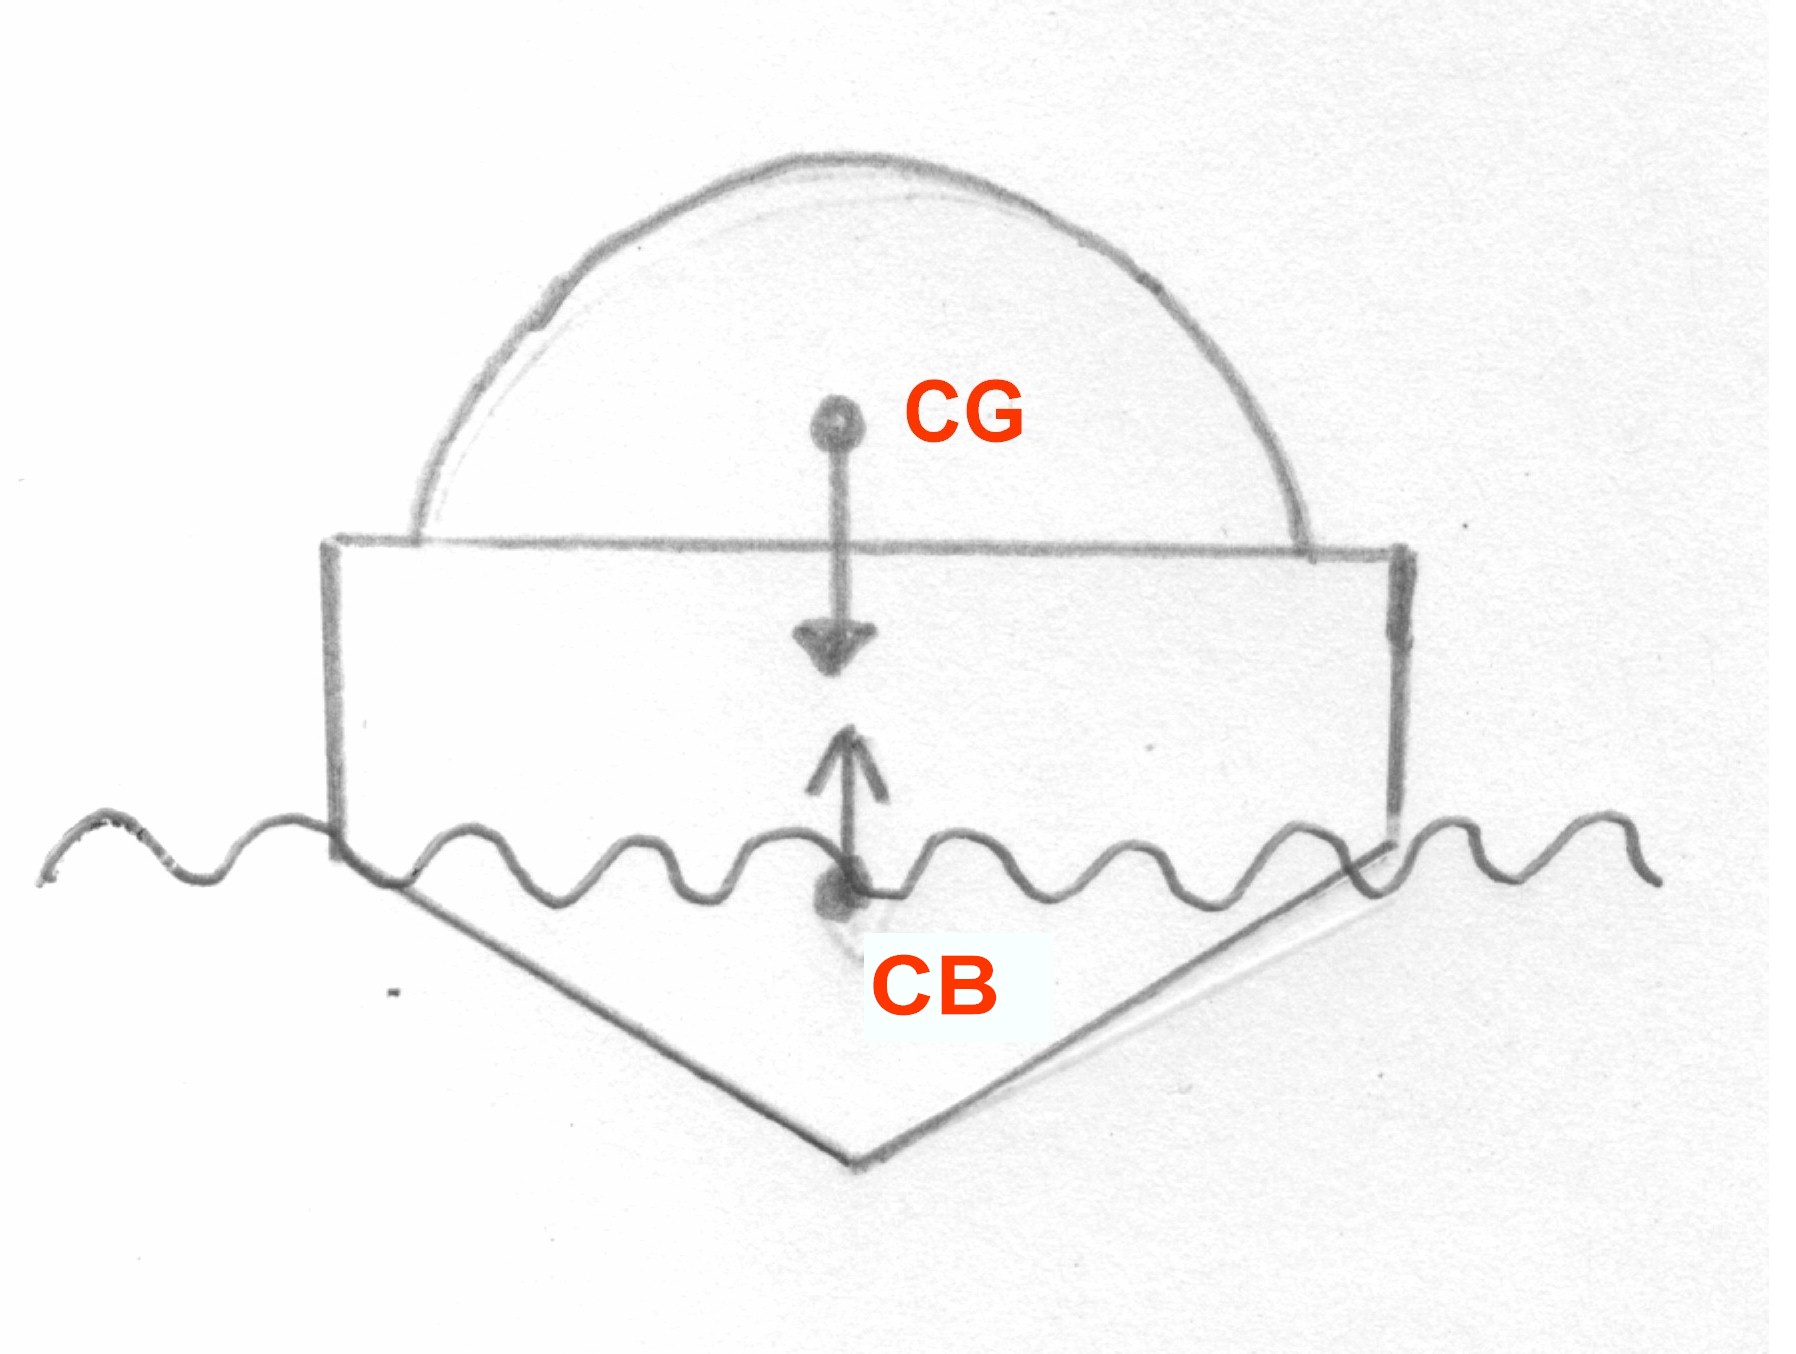
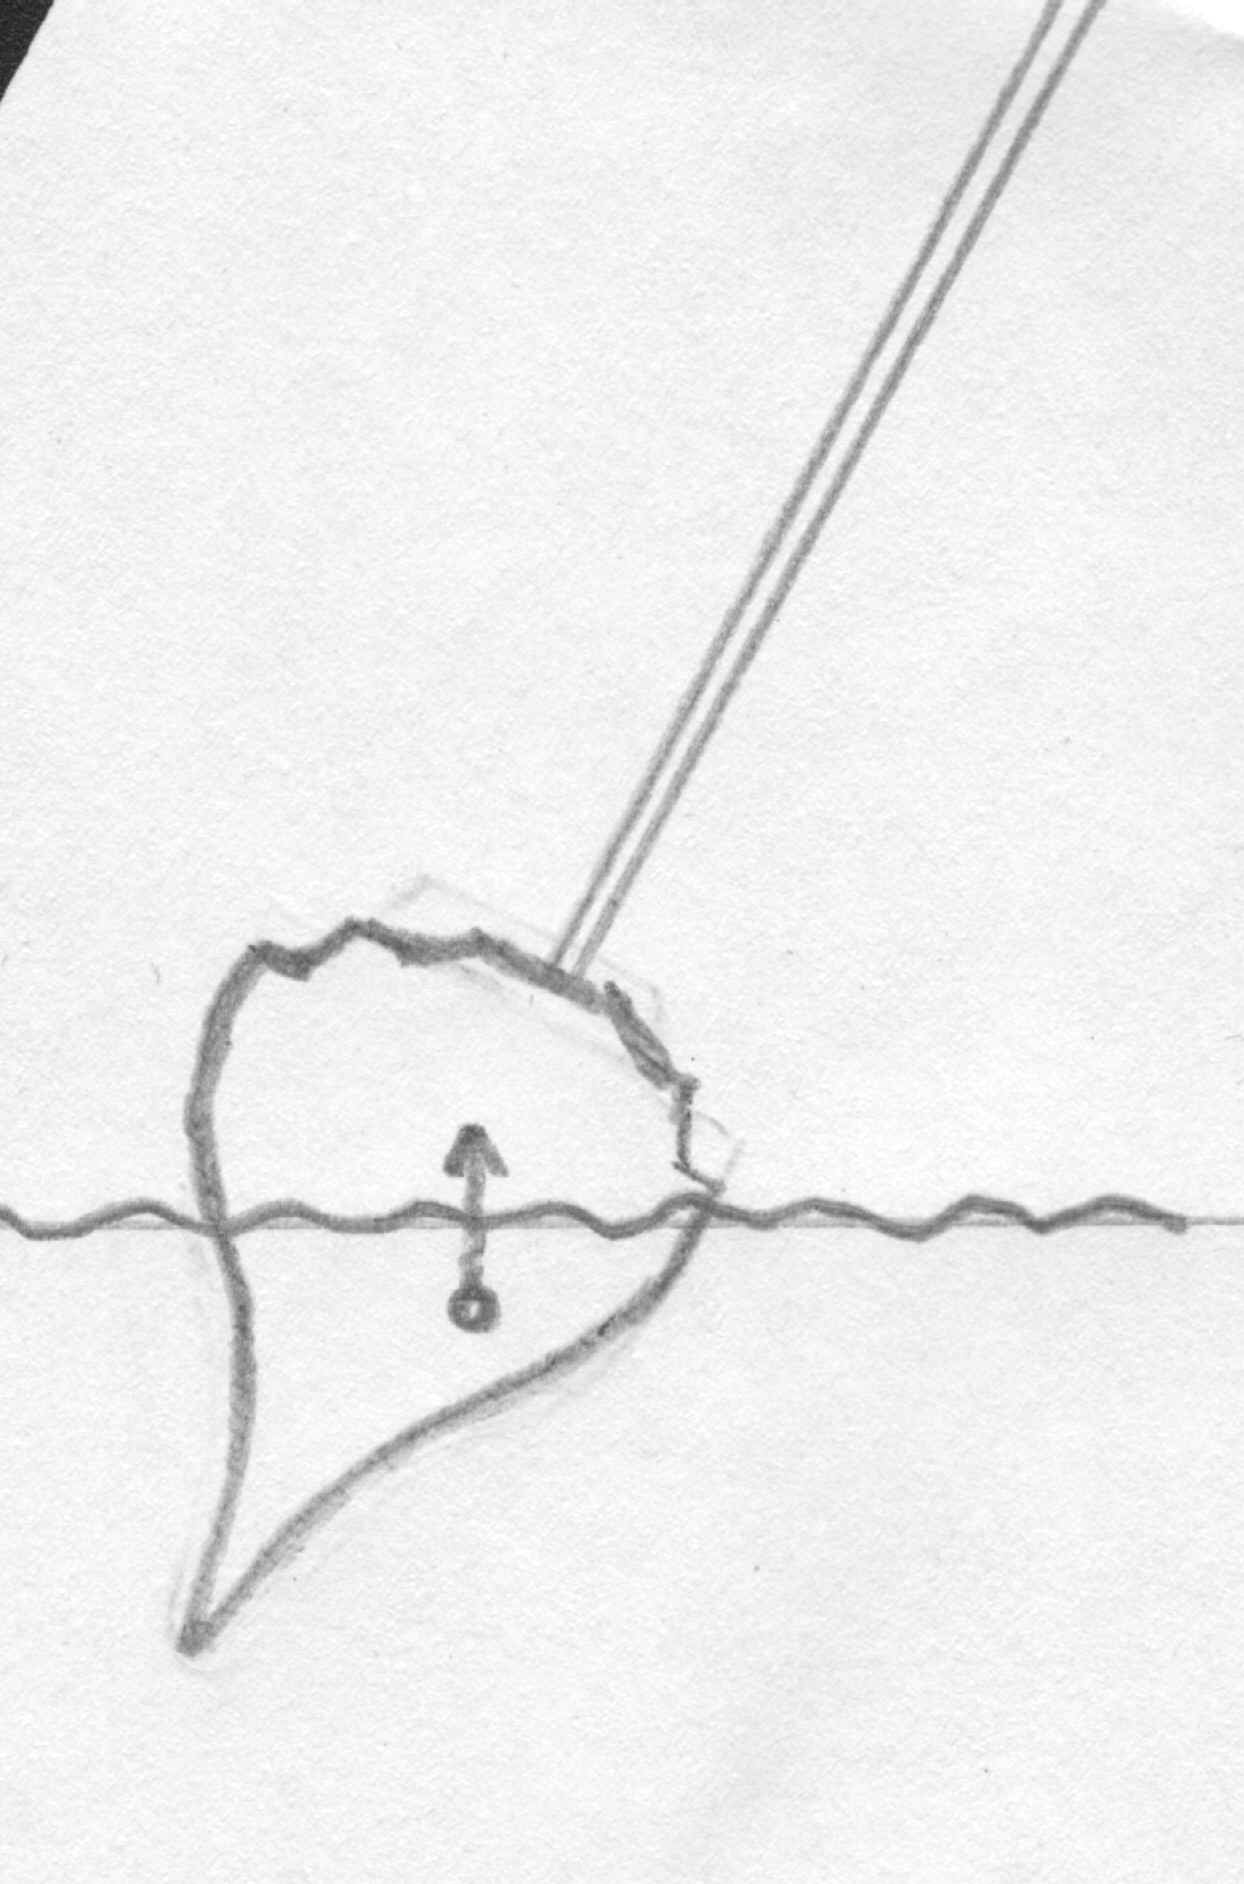
At rest the CB is directly under the CG,
As the boat heels the CB moves
outboard. 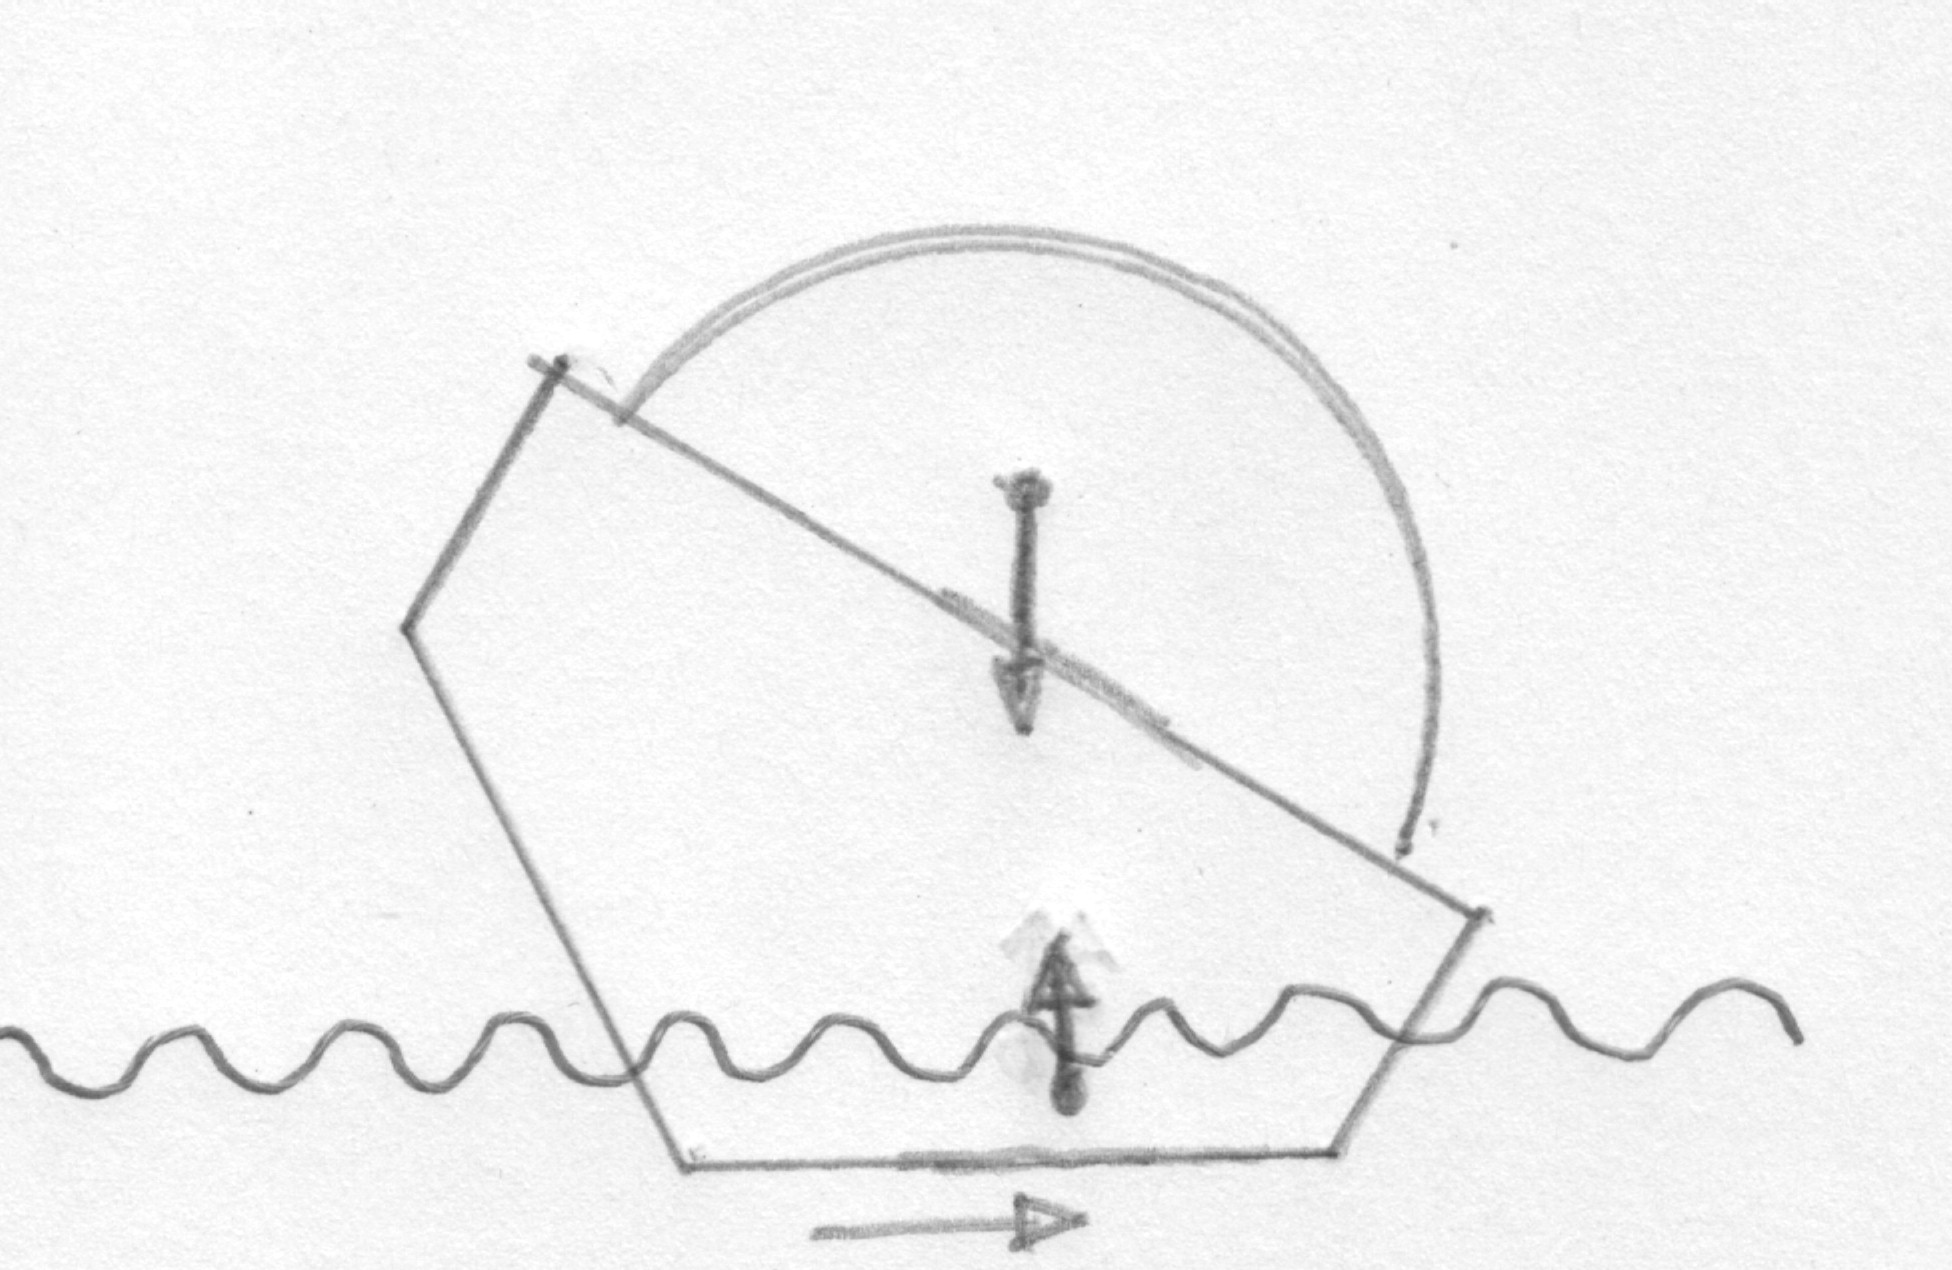
If the CG moves quickly outboard at the same time, she is an unstable
vessel.
If the CB moves outboard quicker than the
CG the vessel is more stable and has
more righting lever.
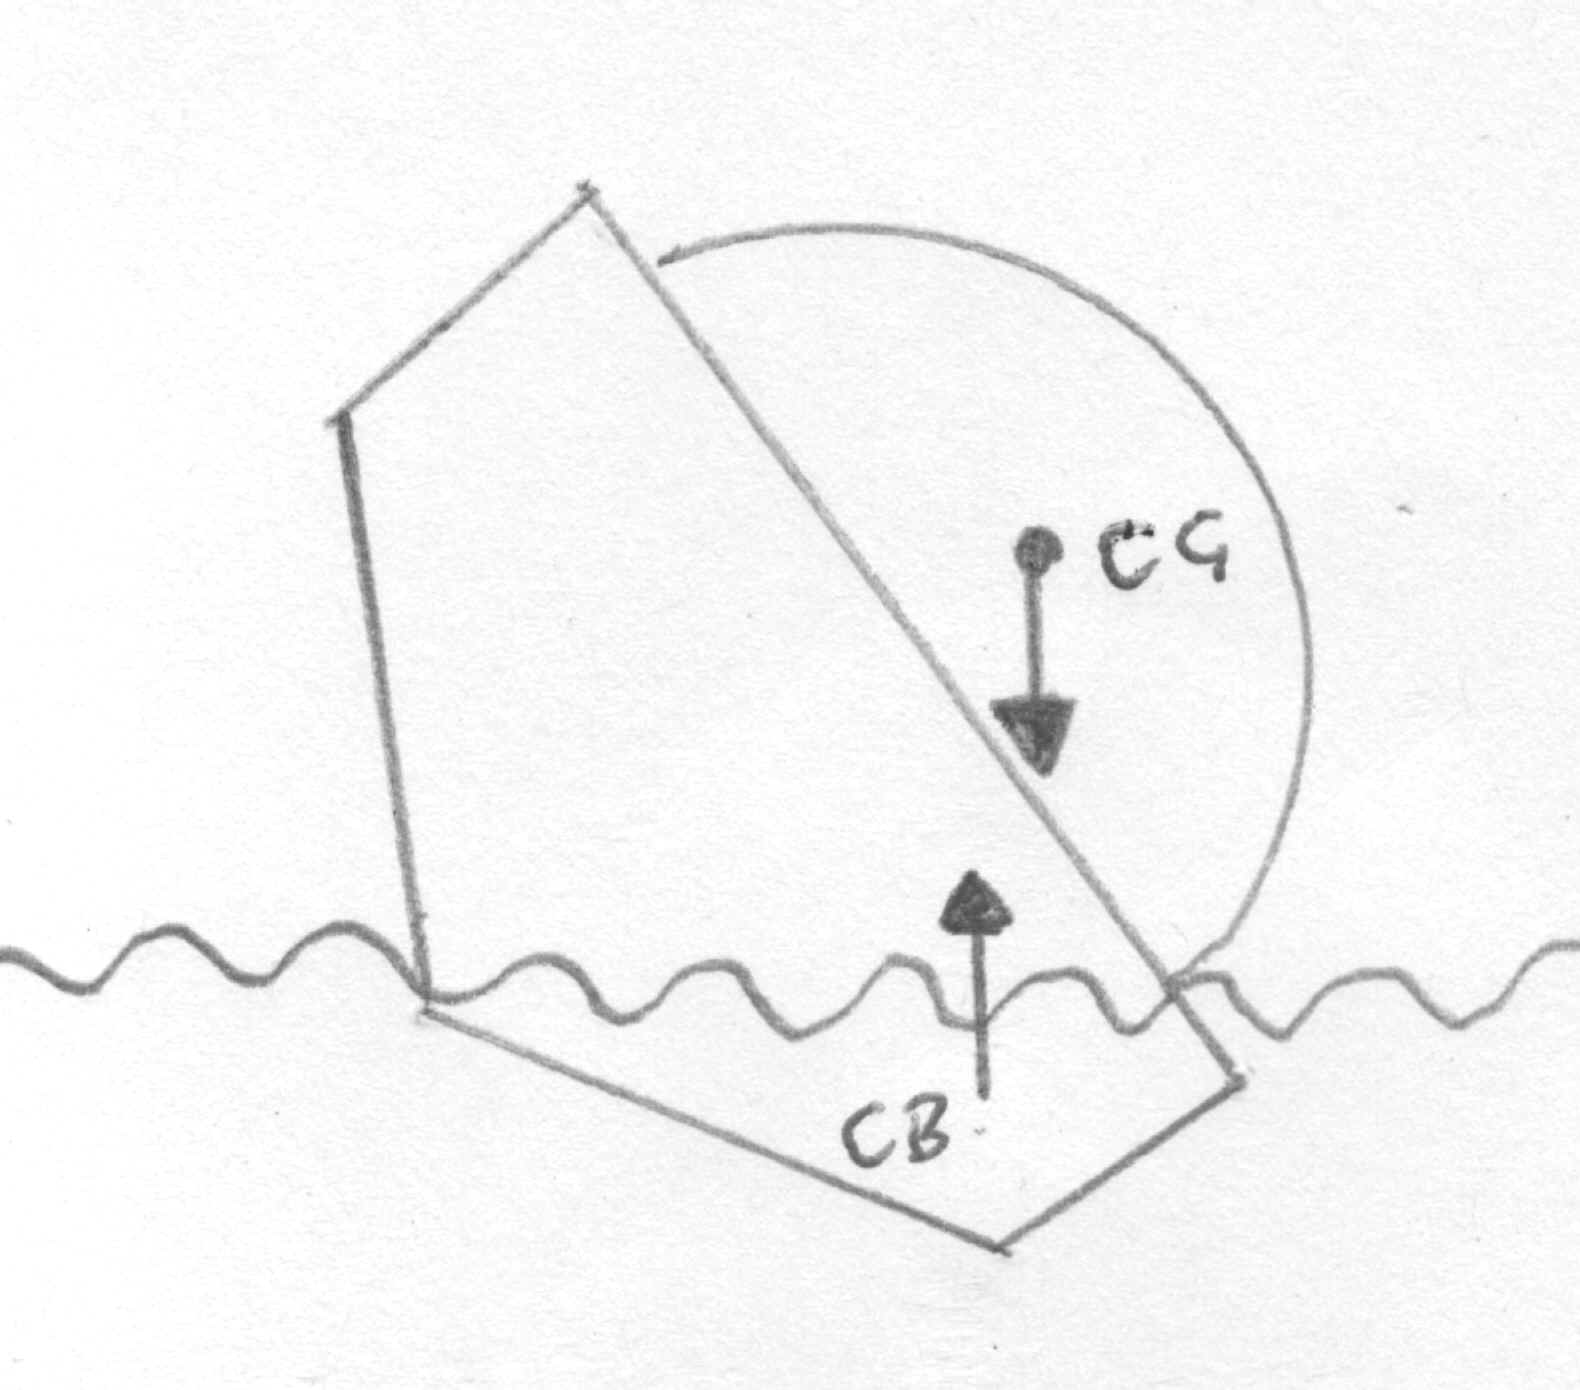
Eventually as the vessel is pushed further over,
the CB cannot move any
further outboard. The point at which
the vessel can no longer recover (right herself) is called the "Angle of vanishing stability". She
will then capsize.
So the further outboard the CB can move, the more stable the boat?
That is true to a certain extent. Wider hulls have more initial stability. The problem with these very wide hulls is that when the boat does eventually capsize, she is happy to stay up side down. Catamarans, Trimarans and many modern high volume cruising monohulls, even deep sea ocean racers with wide flat hulls are at risk here. They are very "stiff" (high initial resistance to heeling) and this makes them very powerful as they can carry large amounts of sail in strong winds, but once the buoyancy of the wide hull is overcome, they are in grave danger. Having capsized, the wide flat decks of vessels like this stop the boat from righting herself.
Narrow hulled yachts are more tender (heel in lighter winds) Once heeled
though, they become very stable as long deep keels give a large righting lever.
If they do eventually capsize, they will not stay upside down because of the
heavy deep keel and narrow raised decks.
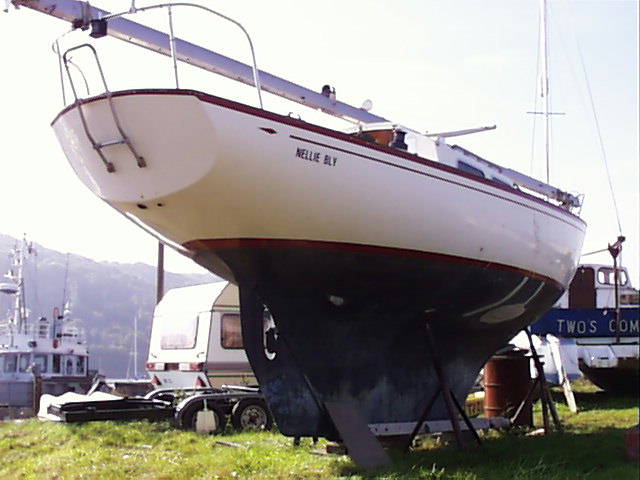
Considered by many to be a safe cruising hull shape. The long fin and skeg can
be seen above.
Provided they do not take on water, they naturally want to be the right way up!
The above is always assuming flat water. Rough seas add a further and
more frightening dimension.
A breaking or very steep wave can capsize or "pitch pole" (throw end over end) any yacht. The prudent yachtsman knows the characteristics and
capabilities of his vessel and sails only in the correct conditions and
stays well away from tide races and areas of
large breaking seas. Beam on to the sea, a wave of equal height to the
maximum beam of the vessel, could cause it to capsize if the wave is steep
enough.
Modern boats have a calculated Stability category. This gives the skipper an
idea of the likely characteristics of a given vessel. Ask the builder or broker
for a Stability Analysis. This is a sign graph comparing righting moment to
angle of heel. It is possible to see the yachts stability category from one of
these curves and also to get an idea of how stable the vessel is when she is
inverted.
Yachts are given a category either a, b, or c. Category A is given to vessels
who's calculated stability means that they can recover from a knock down of
about 130º without inverting. Category B can recover from 120º and Cat C from
only 95º
Here are two stability curves (They are for the purpose of explanation and
not actual boat curves)
The curve on the left is one you might find for a vessel with high initial
stability (wide beam) A small light weight keel and wide flat decks. Area A is
large, so she is likely to stay inverted for longer. Although she has higher
initial stability, she cannot recover from about 100º heel angle.
The curve on the right might be from a vessel with moderate beam and with a deep heavy keel. She would also have raised upper decks. You can see that area B is small. This means that she would recover quickly from inversion. This boat would have less initial stability, but can recover from an angle of about130º
In Practice. The above is all very well if you are a naval architect, but as a sailor I give it very little time. Here are some other hazards which affect stability which are easy to see and understand
- Large breaking waves which result in knock downs and inversions
- Hatches or openings allowing water into the vessel. eg, galley and heads sinks, toilets, port lights left open. This water causes "free surface movement" As the boat heels, the water runs to the low side and exaggerates the effect.
- Knock downs by unforeseen gusts, which lead to swamping due to open hatches.
- Broaching when running before the wind in steep following seas, again leads to swamping.
- Extra top weight. eg, radar scanners, roller furling headsails, in mast reefing. Anything that raises the CG.
So sail your boat in the conditions it was designed for. keep
hatches and ports closed at sea and have signs on them telling others
to. Don't fly too much sail when running. An easy rule here is:- Never
fly more sail down wind than the boat could cope with if you had to turn up
wind. If you are a power cruising yachtsman then do not run at speed down
steep waves. The bow will dig in and the boat will broach. It will then be
caught beam on to the sea and roll. Stream warps, slow down and
trim the bow up.
Apart from jamming, there is the other down side of roller sails! They
are very heavy! Most cruising yacht sails are hard to lift by one man if they
are in a sail bag. So leaving them aloft inside the mast or around the
forestay is definitely not helping her ability to recover from a knockdown.
Lots of yachts carry a permanently mounted radar
reflector, which chafes the sails and adds top weight. 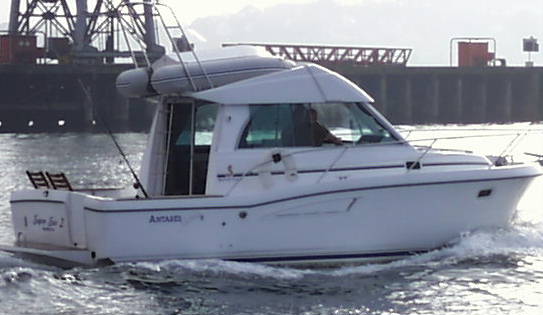 Why not hoist it on
a flag halyard on the "odd occasion" that you are out in bad vis?.
Have a look around a marina and wonder at the seamanship of keeping a heavy dinghy
on the "roof rack" of a power cruiser?
Why not hoist it on
a flag halyard on the "odd occasion" that you are out in bad vis?.
Have a look around a marina and wonder at the seamanship of keeping a heavy dinghy
on the "roof rack" of a power cruiser?
A booklet is available from the RYA. "Stability and Buoyancy" G23 2000.
Yachts have many different types of underwater shape.
Keels
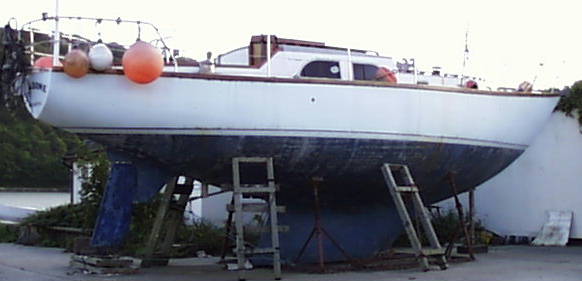
 Long keeled
boats are traditionally long distance cruisers. As you might imagine,
they track in a straight line without a great deal of tending of the tiller
or steering wheel. You can see another advantage of a long keel yacht;
she has beaching legs, so she can take the ground
without falling over.
Long keeled
boats are traditionally long distance cruisers. As you might imagine,
they track in a straight line without a great deal of tending of the tiller
or steering wheel. You can see another advantage of a long keel yacht;
she has beaching legs, so she can take the ground
without falling over.
Can you imagine a boat with a keel as heavy as this, staying upside down?!
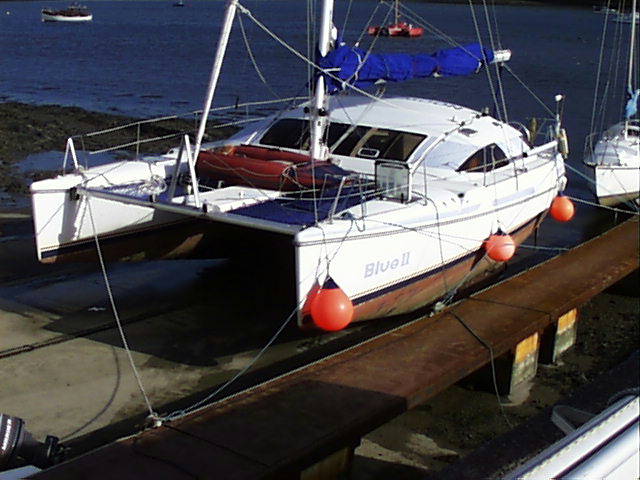
Fin keel yachts are more manoeuvrable and turn more easily. This is an advantage in a marina or tight area, but at sea they can be harder work to keep on course.
| Bilge keelers can take the
ground easily, but they do not perform as well under sail as boats with
fin keels. This one has no propeller shaft. Instead it has a sail
drive unit, which is a sealed propulsion leg through the bottom of
the hull. Saildrive's have become very common these on production yachts. This is mainly due to the fact that they are easier to fit as ther's no prop shaft to align. They do have the advantage of always directing water straight at the rudder where some inclined shafts do not. |
 |
| Triple keel is an adaptation of the long keel, to stop the boat falling over when grounded and to give more grip to windward. However, the more keel (wetted surface) you have, the more friction and therefore resistance to movement there is. – i.e. it slows you down! |  |
| Power cruisers have shallower
draught as a rule, though there are deep hulled power boats such as
trawler yachts. Most have hard chined hulls
to give more grip when turning and also have trim
tabs which, are used to set the trim. If the trim tabs
are set down, the bow will dip. If they are set up, the bow will
rise. They can also be moved independently to trim the craft to port
(left) or starboard (right) when underway. Trim tabs are important in steep seas for example when running down sea, set the tabs up to raise the bow. This will prevent the bow diving in and causing broaching. |
 |
| Rudders Blade (unsupported) rudders are wonderful steering mechanisms, but if you hit anything they can fall off or bend so that you cannot move them, which is even worse. So we have skegs to add a bit more strength and if you want to be belt and braces, go for a fully supported rudder. These are strong but not so efficient. | 
|
Most yachts these days have a set of stainless steel wires or rods which hold up the mast and keep it in column (no bends in the middle).
There are so many different types of wire rig that it is outside the
scope of this course, but most have a backstay
which is attached to the hull at the stern and the mast
at the top (head). This stops the mast falling forward. There is
also a forestay from the masthead forward
to the bow. This stops the mast falling backwards. On many
modern yachts this is covered by a roller furling foresail, so we can’t
see it. Neither can we see if there is anything wrong with it!!
There are two shrouds, one on either
side, from the masthead to the hull midships. These stop the mast
falling over the side. They have spreaders
to give them a better mechanical advantage on narrow-beamed boats. The
area about these is called the cross trees. Then
there are various lowers: stays
which stop the mast bending. Collectively, all of this is called standing
rigging and it has many variations.
This Stainless steel wire or rod is under strain at all times and takes a much
greater strain and shock load when at sea. It does not last for ever and needs
replacing at around ten years. When you replace it, the old stuff will still look like
new and the new will be expensive!. To my cost, I have in the past been slack here and
left it for longer. You soon learn your lesson though when the mast goes over
the side in mid channel.
Take the mast down annually and have the rigging checked by a professional.
If you do have a rig failure at sea, then it is not always terminal. you can get the weight off that side by tacking or running straight down wind. Temporarily use halyards for support, then use some spare wire and bulldog grips to repair the damaged stay. You need to carry the repair kit of course!
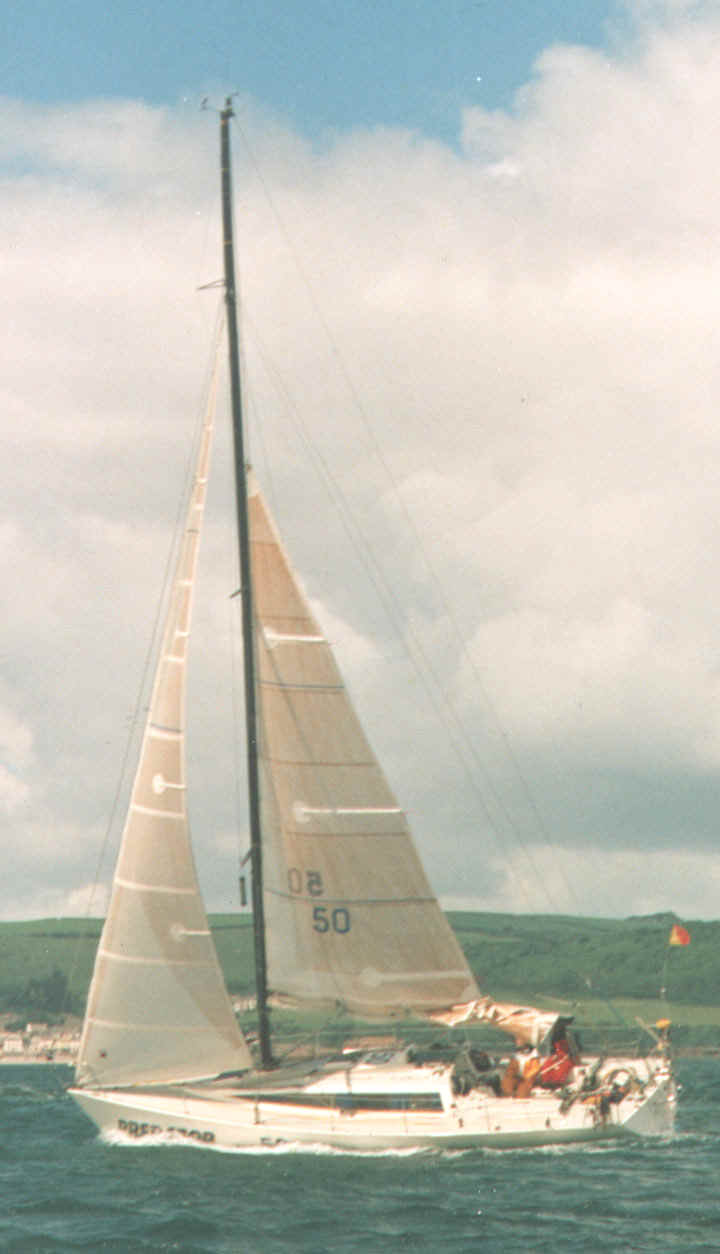
| Sails
Again this is huge subject and I will not cover it in depth. The most common form of sailing yacht around today is the Bermudian sloop. It is a simple, two triangular-sailed affair. A mainsail and a foresail. Within this group there is again variation. The boat on the right is a fractional rig, where the forestay and therefore the foresail does not reach the masthead. This one is said to be three-quarter rigged as the forestay goes into the mast three quarters of the way up. Notice that the mast is stepped well forward. This kind of rig carries a large powerful mains'l and to keep the boat balanced, the mast has to go forward.
|
 |
| This is a is a masthead-rigged Bermudan cutter.
She has an extra staysail for better windward
performance and strong wind sailing. In stronger winds when the heads'l
is being reduced and particularly if it is a roller
furler, the "slot" is lost. This is the way in
which the main and foresail interact together to gain more lift. As
sail area is reduced , the stays'l is set to keep this interaction. The
stays'l on most cutters, also acts as a storm sail as it is strong,
small and usually self tacking.
|
 |
| Spinnakers and
Cruising chutes
Don't be frightened of them! Follow a few simple rules and they are good
way of making a passage under sail when if you didn't use them, you'd be
motoring.
|
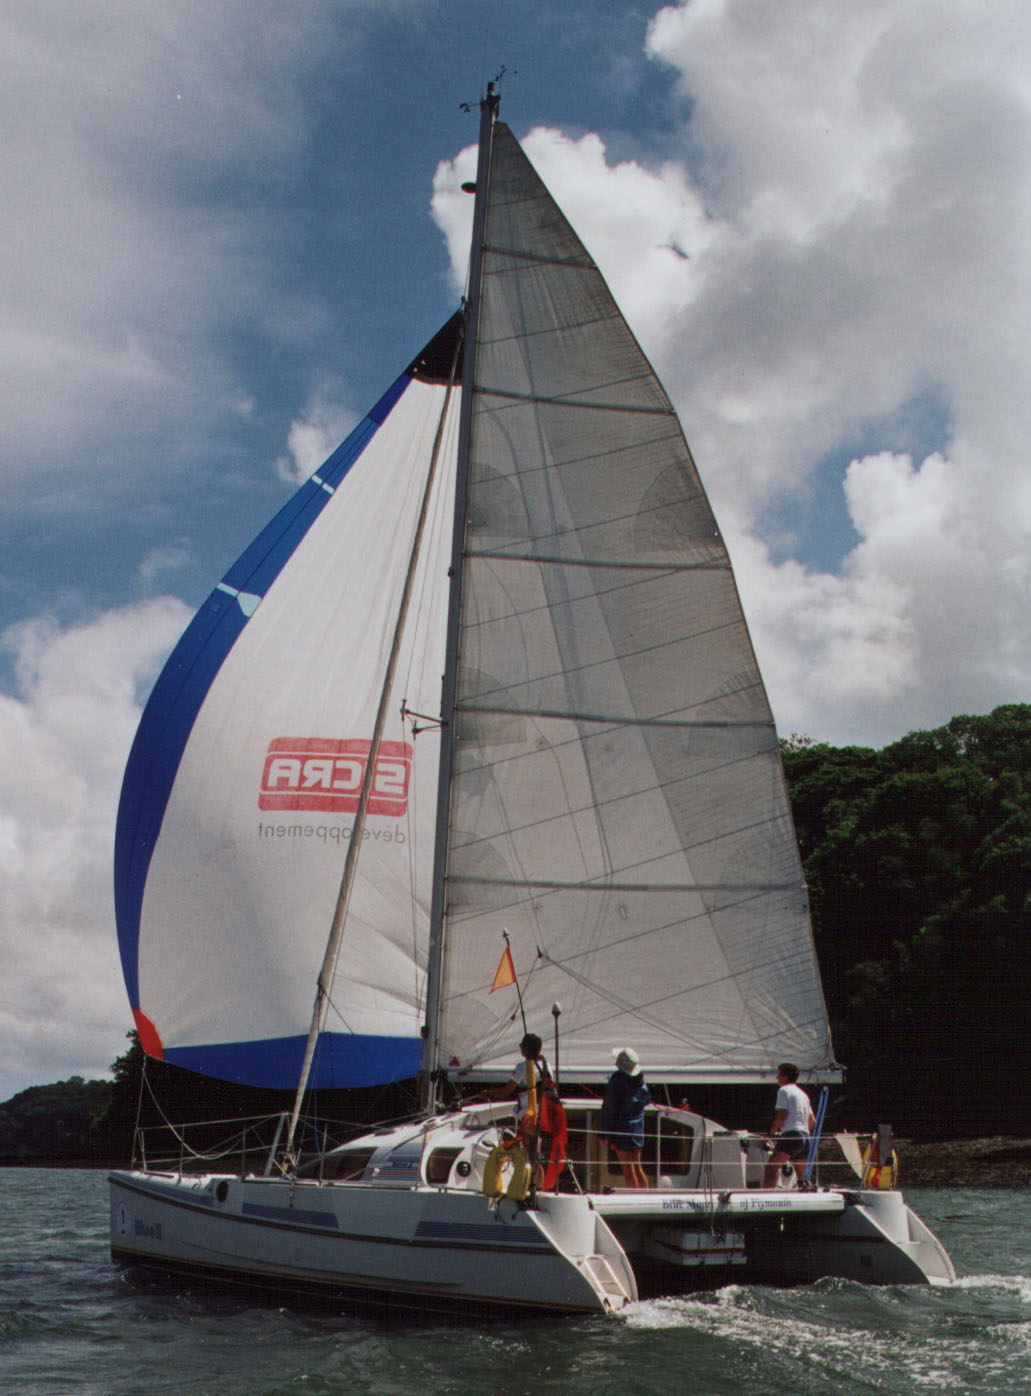
What tack is she on? |
A few words here about likely chafe areas. On modern yachts it is a major
problem due to the introduction of full battened mains sails and swept back
shrouds. Here Steve is fitting a baggy wrinkle
to stop the worst of it.
Swept back shrouds cut out the need for backstays and therefore allow more roach
to be carried. To stabilise this roach we need full length battens.
When running down the wind with this rig, chafe is a nightmare. Baggies are dead
easy to make and they are the best chafe protection I have found. These big
mains with large headboards also tend to chafe halyards at the mast head sheave.
Chafe is found in other areas too and not just on sails and halyards. A
dinghy tied down to the deck in a storm can if it moves at all, soon chafe
through its lashings and we have just had a 35 foot Cat break loose from its
mooring due to chafing of her swinging mooring lines. Watch out for chafe or
it'll cost you!
On cruising boats these days, we are very likely to be using a roller furling headsail.
The sail can be reefed quickly or taken in completely without the need to go on the foredeck, (or, in this case, out on the bowsprit)!
I have found a worrying trend becoming firmly established. Cruising boats
these days tend to carry one heads'l on a roller instead of various sails for
different wind speeds.
Roller furling sails are inefficient when half rolled. They create drag, wreck
the yachts pointing ability and of course affect its stability.
I hope I am not giving the impression that I do not like roller furlers. I think
they're great!
But if you carry a couple or three different sized headsails and choose the right one for
the day, you will point better, heel less, go faster and your sails will last
longer because you will tend to keep them in a locker! not on the stay. Yes
these sails have sacrificial UV strips, but if you leave the sail rigged for the
months and months that you not sailing it will last years less than if it was
stored properly!
A word about safe use of mainsails.
Just a couple of points. "Boom preventors" and
"Reefing earings"
A boom preventor simply stops the boom from crashing across the cockpit if
some one accidentally gybes.
They are a great idea and can save lives and damage to gear. Crash gybing can
lead to major rig failure. However, boom preventors need to be rigged correctly
to be safe. They must be strong enough for the job, (at least the same strength
as the main sheet) and rigged to best mechanical advantage. They also need to be
easy and fast to remove. they cannot therefore be attached to the boom then
cleated off on the foredeck! (this is the normal method I see) Take the line
around a block and back into the cockpit
I am sorry this is such a terrible picture, but you can just make out the preventor leading aft. Behind the coach house it runs through a block to a winch.
There are two reasons for needing this quick release system.
1, You may need to alter course fast. eg you see a 50 gallon oil drum in front
of you!
2, If you do accidentally gybe, you need to either gybe back before you loose steerage, or get the preventor eased away quickly because you have the mainsl "aback" and you are going to start going backwards down wind! This can be very serious, causing rudder damage and on some boats (coupled with big seas) capsize.
Earings.
These are simply extra strength for slab reefing lines. Reefing lines come
under tremendous pressure due to heavy loading, chafe and torturous angle
changes. they always seem to me to be too small in diameter for the job. For
example on our training boat at present, a 34 footer. we have 12 mm reefing
lines. So does my next door neighbours 42 footer. his boat has almost twice our
sail area. this is not uncommon.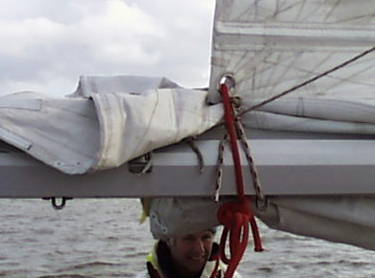
Snapping a reefing line can be very scary and usually includes tearing the
mains'l very badly. Particularly if you have tied in reefing ties to hold
the bunt of the sail cloth not being used around the boom. All it takes
to stop this problem is to add an earing when you put in a reef.
The red rope is the earing, the white rope with red fleck, the tensioned
reefing line. If the latter snaps, the earing takes the strain.
To moor alongside a quay or pontoon safely we must know a few knots. By now you should know them, but revise them anyway. I think you can get by with five or six. We also need to understand the various properties of common synthetic fibre ropes.
 Nylon
Strong, stretchy, sinks and lasts well in UV light. Good for anchor warps
and mooring. Good resistance to chafe. Be careful when buying nylon ropes. The
breaking strains for them are given for dry rope. This reduces by 30% when
wet!
Nylon
Strong, stretchy, sinks and lasts well in UV light. Good for anchor warps
and mooring. Good resistance to chafe. Be careful when buying nylon ropes. The
breaking strains for them are given for dry rope. This reduces by 30% when
wet!
Polyester Strong, low stretch, lasts well in UV light if sheathed. Also soft on hands. Good for sheets and halyards. This rope has a laid core and braided cover, both of Polyester.
Polypropylene Strong, stretchy, floats. Very badly affected by UV light
and chafe. Cheap but doesn’t last.
You can see here that I am pulling degraded strands out of this polyprop warp!
Also available, but not widely used aboard most cruising boats are Dyneema, Spectra,
Vectran , PBO Zylon and Aramid ropes. All these are very strong, eg Dyneema is
ten times the strength of steel!
It also floats and soaks up negligible amounts of water, therefore stays light
when wet and has good abraision and flex fatigue resistance.
They are all much lighter for
the same strength required and have hardly any stretch. On racing boats this
is very important. So, why don't we just use this stuff? It is obscenely expensive!
Oh yes. Some of these high tech ropes do not like our traditional knots and
need special ones. I am sorry, but I don't know them.
 To
moor alongside safely in all weathers we need to use six lines from the boat to
the pontoon.
To
moor alongside safely in all weathers we need to use six lines from the boat to
the pontoon.
We all know that for a quick stop for lunch, when crew are staying aboard, it is permissible
to use only four mooring lines:
The trouble with this system is if any one rope breaks or a knot fails, the boat will move
a considerable distance, so much so that it could put too much strain on other
warps and they may also fail. Not good!
If you add to this lot an extra, longer bow line and an extra, longer stern line, each rope has a back up. This is also important if you are rafting out from another vessel. Her warps are built to hold her weight, not yours as well! .Put out bow and stern shorelines. Do not put too much weight on your breast lines, as by their nature they are short. Short lines snap. Use a longer bow and stern line to take the strain!
 When
you have to cope with tidal rise and fall, then you must use warps which are at
least three times as long as the expected drop or rise in depth. These long
warps can be weighted in the middle to hold the boat close to the quay at high
water when the lines will be slack. Taking your lines to the outboard side of
the boat helps a lot here, particularly if you have a wide beam. you also need
to try to reduce chafe on your lines over the wall.
When
you have to cope with tidal rise and fall, then you must use warps which are at
least three times as long as the expected drop or rise in depth. These long
warps can be weighted in the middle to hold the boat close to the quay at high
water when the lines will be slack. Taking your lines to the outboard side of
the boat helps a lot here, particularly if you have a wide beam. you also need
to try to reduce chafe on your lines over the wall.
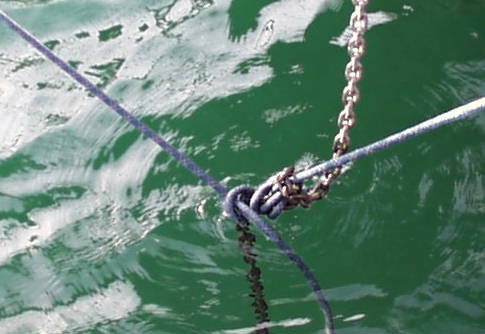
Some quays have chains
hanging down for the purpose. 
These also get rid of the need for weights.
Not a brilliant picture but you
can see that the chains cut out chafe
and their weight can be used to keep the
vessel alongside as the tide rises. ie pull the
lines in tight at low tide, then as the tide
floods, the chains hang vertically, keeping
the lines tight, and therefore the yacht alongside.
You can also see on this picture that long
bow and stern lines taken outboard from the
quay, cut out the need for breast lines and to a certain extent, springs. Using
springs on walls is tiresome as they tend to get caught on fenders and pull them
out. Whether you need them or not largely depends on the shape of your boat.
| CRUCIAL STUFF! |
|
Securing To a Cleat
There are four ways of making the rope off on the pontoon.
| You can cleat off like this. This method is secure
and quick, but you will have to change it once the boat is secure. If
you leave it, the crew of the other boat will have trouble attaching
their lines. And if they cleat over your rope, then you cannot leave
without undoing their rope.
|
 |
| You can lasso the cleat. Again, this is a very temporary measure but can be done easily from the deck. This is a useful technique when it could otherwise be dangerous, or impossible, to step off the boat to cleat your warp (mooring rope). |  |
| I know you can tie a round turn and two half hitches! and
so will all your crew. This knot will do a reasonable job in most
applications and most crew do not get it wrong!! It is secure,
will not impair any other vessel’s ropes and will come undone when you
want (but not before) and you can tie and untie it under load.
|
 |
| Or lastly there is the bowline. This is a very secure knot, but it cannot be tied or untied under load. It is not an easy knot to use when you first come alongside, but it does not obstruct the cleat for others. I find even experienced crew get it wrong! so always nip around the knots to check them |  |
On board we "cleat off". There is a right and
wrong way to do this.
 Cleats
have two stanchions. You should always go first around the stanchion which is
furthest from the direction of pull. Put on at least three figure-of-eight
turns.
Cleats
have two stanchions. You should always go first around the stanchion which is
furthest from the direction of pull. Put on at least three figure-of-eight
turns.
Other knots which you need to revise are the Clove Hitch, the Rolling Hitch and Figure of Eight, Tugmans hitch and the Alpine butterfly.
The Clove hitch is a quick, easy, one-handed knot, used primarily for tying on fenders. Crew get it wrong all the time which usually means you keep loosing fenders!
It is not very strong, constricts if pulled very tight and is then very hard to undo. It can be tied around something, as in this case, or tied first, then dropped onto a bollard or post.
 The
Rolling Hitch. You must know this one. It will get you out of trouble. If
a halyard or sheet
is jammed under load on a winch, then this is the only knot I know which can
help. It is tied around a rope of a larger diameter than itself.
The
Rolling Hitch. You must know this one. It will get you out of trouble. If
a halyard or sheet
is jammed under load on a winch, then this is the only knot I know which can
help. It is tied around a rope of a larger diameter than itself.
 Then, when pulled, it will not slip. In this way you can take
the load off a jammed winch. You can also use it for deflecting anchor and
mooring lines.
Then, when pulled, it will not slip. In this way you can take
the load off a jammed winch. You can also use it for deflecting anchor and
mooring lines.
I use it on a short length of line when climbing masts. One end is attached to my harness and the hitch is around a spare halyard. If the winch man makes a mistake or the working halyard breaks, I don't fall as the rolling hitch tightens and will not slip. (I have to keep pushing the knot up the halyard while ascending)
 The
Figure 8 knot is simply used as a knot to stop the end of a rope
disappearing inside the mast or into the boom. Here is one being used to stop
the bitter end of the kicking strap going back into its blocks. Don't let
the crew tie them into Spinnaker sheets or guys! You might have to let them go.
The
Figure 8 knot is simply used as a knot to stop the end of a rope
disappearing inside the mast or into the boom. Here is one being used to stop
the bitter end of the kicking strap going back into its blocks. Don't let
the crew tie them into Spinnaker sheets or guys! You might have to let them go.
The Sheet bend is used when you need to join two rope ends.
It works best if the ropes are about the same thickness, but will work fairly
well if they’re not. Always leave long tails when you tie this one. It slips
as it pulls tight. It has all the properties of a bowline, except it does not
make a loop.
The Reef knot is not used often on board as it tends to slip and is hard to undo, but you can use it to tie up "reef ties". I tend to tie a "Bow" (shoelace knot) instead as it does the same job, comes out when you want it to and the crew can usually tie it!.
I'm sure you already know the knots above, but here are a couple of others in common use
The Alpine Butterfly
This is actually a climbing knot used for
re belaying. We use it to produce a cleat like this. 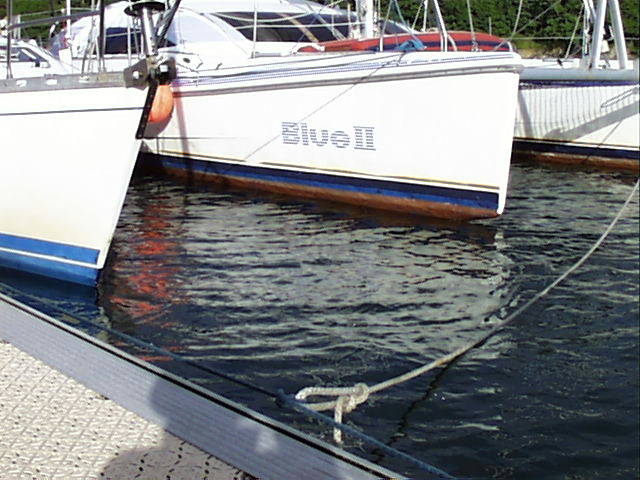
It is very bad form on a
windy day to shrug and say that there are not enough cleats to attach your shore
lines! You simply make a cleat in the right spot
If the boat ahead or astern makes it impossible for you to cleat a shore line.
Simply tie a rope between two cleats with an Alpine Butterfly at the position
you would like a cleat.
You could use a figure of eight on the bight, but try untying it afterwards!
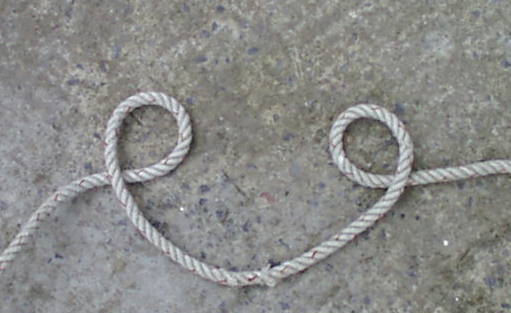
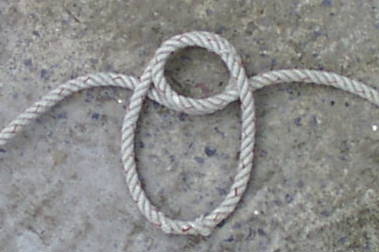
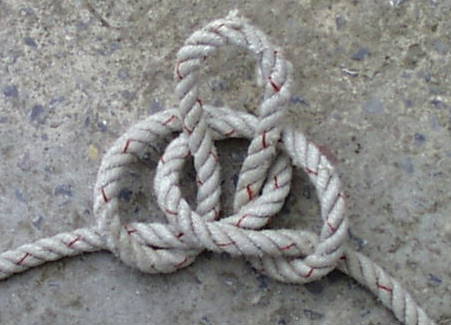
Its easy. Make two
loops.
Put one on the other. The bight goes through the loops.
The Tugman's hitch When you have no cleats left unused, then 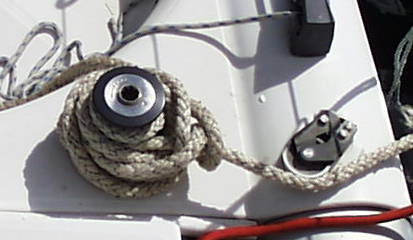
you can
use a winch just as securely.
It will not jam and if you need to adjust the line, you have it on a winch
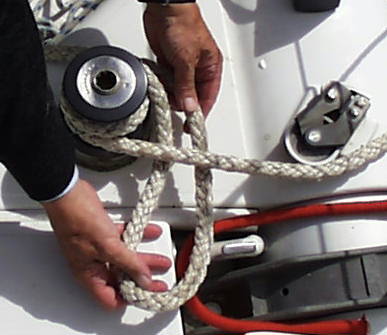
Tension the line with the winch then take a loop under as shown
 Next,
just drop the loop on the winch. Now pull (my left hand)
Next,
just drop the loop on the winch. Now pull (my left hand)
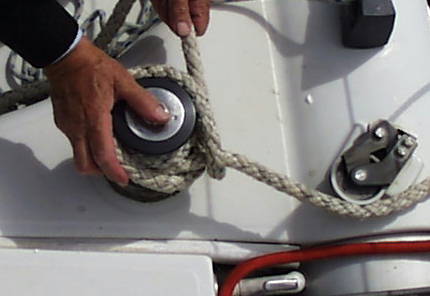
next take an anticlockwise turn around the winch and pass another loop under the
tight rope. Drop that on the winch and pull tight again. Three loops is bomb
proof.
 To
stave off boredom on some long passage and to stop chafe, you might get into
making Baggy wrinkles They are dead easy and
made out of old rope that otherwise you would throw away.
To
stave off boredom on some long passage and to stop chafe, you might get into
making Baggy wrinkles They are dead easy and
made out of old rope that otherwise you would throw away.
When you have about a meter of this. Tie off the end then tease open the
fibres to produce this:-
 All you do then is go aloft in a Bosuns chair and wrap the baggy around the
shroud in the correct area. Whipping twine is the best way of securing them at
both ends.
All you do then is go aloft in a Bosuns chair and wrap the baggy around the
shroud in the correct area. Whipping twine is the best way of securing them at
both ends.
| CRUCIAL STUFF! |
|
This is another enormous subject, which we will only touch on here. Often
anchoring is taken for granted as a minor skill. After all, "you just chuck
it in, don’t ya"? No you don’t. There is vital skill to be learned. It
may save your boat one day as your anchoring equipment and your knowledge of how
to use it are the last resort before being driven ashore.
How anchors work
It always used to amaze me when I looked at a large ship. I could hardly see the
tiny anchor in proportion with her bulk. The fact is that the anchor itself is
only a small part of the system. The chain does most of the work.
The anchor digs its way into the sea floor, but it is held there by the weight
of the chain. The catenary (the curve of the anchor chain caused by its weight)
keeps the anchor shaft parallel with the seabed. When the pressure of wind or
waves overcomes that weight, the anchor shaft will rise and the anchor will
drag. The more chain you use and the heavier it is the better. The catenary also
stops the boat riding back on the anchor and snubbing (violent tugging of the
anchor).
 To
gain this catenary we need to use at least 4 times the maximum expected depth
(don’t forget the tidal rise) if we are using all chain.
To
gain this catenary we need to use at least 4 times the maximum expected depth
(don’t forget the tidal rise) if we are using all chain.
If your boat uses a mixture of rope and chain, then you will need to
use at least 6 times the expected maximum depth.
How to set an anchor
First we have to decide on the nature of the seabed. This can be seen on
the chart, or by looking over the side if the water is clear. There are lots of
different anchors for different seabed conditions - more information on this
later.
You have decided on a type of anchor and you know the depth.
- Pick a spot with enough room for your boat to swing around your anchor and clear all other craft or obstructions. Remember here that boats on permanent moorings or using two anchors will have a smaller swinging circle.
- Stop the boat in the correct place, head to wind or tide depending on the strongest element and lower down the anchor (never drop it). Keep lowering until you know it is on the bottom. Sometimes you can feel it touch, but you know the depth from the echo sounder anyway.
- At this point, tell the helmsman to reverse slowly. Then pay out the required amount of chain and cleat off. We need to slow down further now, so as not to snub the anchor.
- When the anchor starts to dig in, you will see the chain start to straighten in front. At this point you put on more power to make sure the anchor is secure. Feel the chain outside the bow roller. It should not be grumbling or vibrating and if it is, the anchor may be dragging.
- Check this by watching a transit on the beam. If the transit holds, the anchor is holding.
Anchor types
There is a huge array of anchor types. Here are some, commonly found on yachts:
| The Plough (CQR) is a cast steel anchor with a hinged share. It holds well and sets quickly in mud and sand, but skids on rock and weed. It is also popular because it stows easily on the bow roller. |  |
| The Danforth is made of plate steel
(which sometimes bends). It holds well in sand and mud and will spike
through weed into the sand underneath. It has lots of bits sticking out
and therefore will tend to find some way to grip in rock (anchoring on
rock is not secure).
It stores flat. If during your stay at anchor, the tide turns or the
wind changes and the anchor tries to reset in a new direction, these have
a habit of keeping a large clod of mud in the flukes. This clod prevents
the anchor from resetting. |
 |
| The Fob has the same properties as the Danforth, but is made of cast steel (which doesn’t bend). |  |
| The Bruce. This anchor is made of cast steel and has no moving parts. It can be hard to stow, but has a very high holding power in all seabed conditions. It suffers like the Danforth from clods of mud, which can stop it resetting. |  |
| The Delta is made of steel plate and has
no moving parts. It is my personal favourite. Good in sand and mud, but
not so good in weed and rock. Set one of these properly and you’re going
nowhere! Very high holding power, but not so easy to stow as the Danforth-like
anchors. |
 |
| The Fisherman is not used commonly aboard yachts, but most boats carry one. It does not have a great holding power, so needs to be much heavier than the more modern varieties, BUT it will hold in all seabed conditions. It does fold flat by laying the stock next to the shank or shaft. |  |
Most yachts carry at least two anchors: a main bower anchor and a smaller kedge. This smaller anchor was used traditionally to haul a vessel off a lee shore. It was taken out by ship’s boat and laid well ahead. The ship was then hauled forward and rode to this anchor while another was rowed further forward and so on. Today we usually motor out of situations like this (if the engine’s not broken!) The kedge is different from the bower, so that you can anchor in different seabed conditions eg, a delta and a danforth.
Weight in the bow will
enhance pitching so keep the kedge and its chain back aft somewhere if possible.
You will end up setting it off the stern in lots of situations anyway.
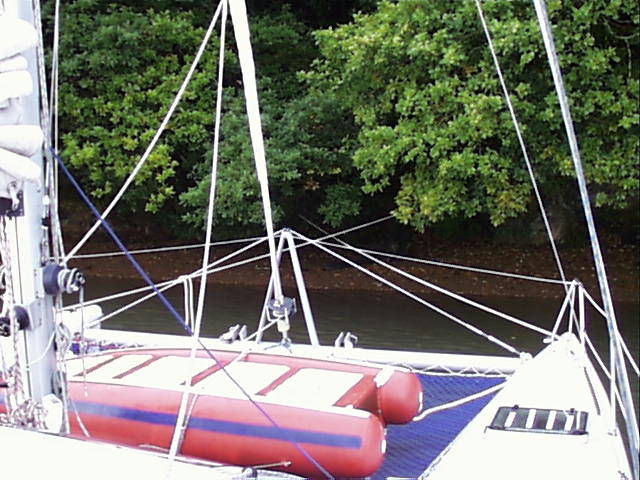
Here twin stern anchors have been laid and crossed over the stern. This method
not only stops fore and aft movement, but also movement from side to side. Twin
shore lines are also used from the bow. A very secure method of mooring and in
fact it is being used here to sit out storm ten in a sheltered spot.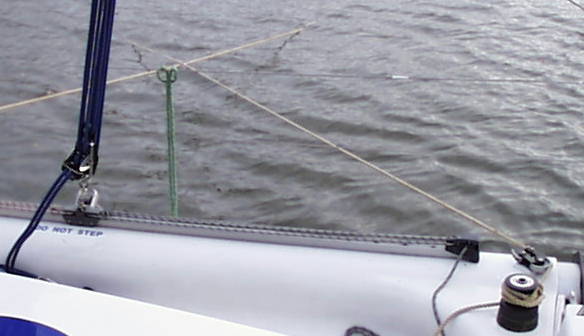
Anchors and their chains are tough on the hands. Get the crew to wear gardening gloves or the like. Make sure they are briefed to cleat the cable as soon as they have the required amount out. Or cleat off at the required scope before laying the anchor. I have seen some nasty injuries caused by fingers being pulled through bow rollers. Tell them to Let go if necessary!
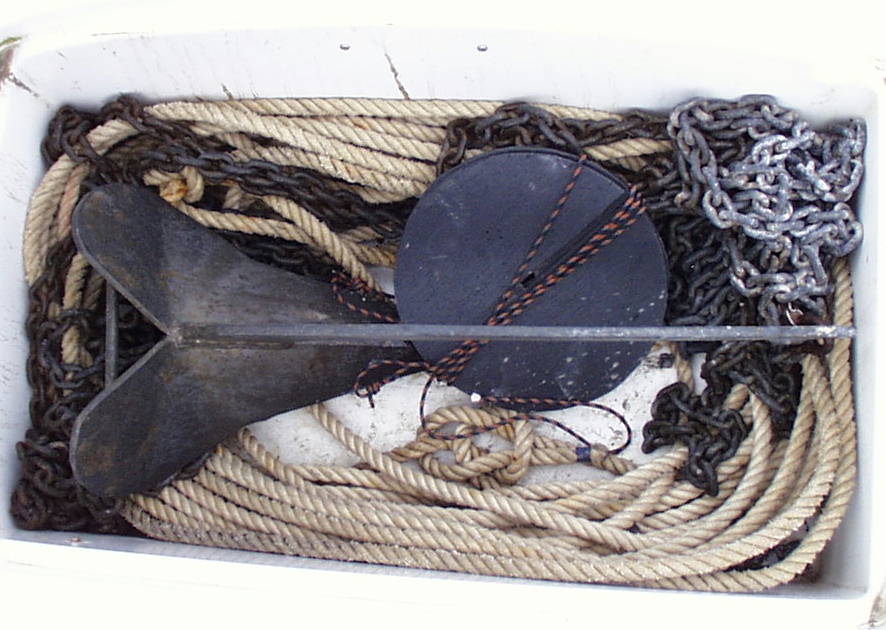 It
is very important to stow the anchors correctly, so that they can be deployed
quickly if necessary. If you have an on-deck anchor locker, then always make off
the bitter end (inboard end) of the cable to a strong point. Stow the anchor warp
in the locker first, then the chain on top and last of all, the anchor.
It
is very important to stow the anchors correctly, so that they can be deployed
quickly if necessary. If you have an on-deck anchor locker, then always make off
the bitter end (inboard end) of the cable to a strong point. Stow the anchor warp
in the locker first, then the chain on top and last of all, the anchor.
Note the anchor ball day shape
Secure the lid. You do not want the anchor jumping around the deck in a rough sea!
Bridles shown here on a multihull, work just as well on monos to stop
snubbing and sheering. On some catamarans they are crucial as anchor loads are
high and forward deck beams are weak Yes its another job for the rolling
hitch. 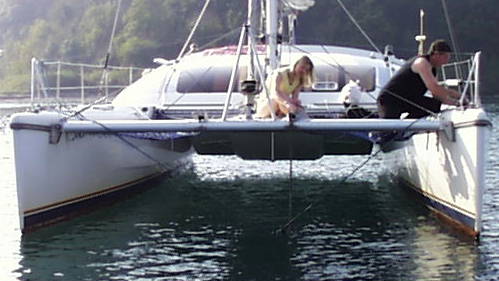
 Two
nylon lines,
Two
nylon lines,
rolling hitched to the chain. Then the chain slackened and the weight taken on
the stretchy nylon.
This also stops the multihull from shearing about.
Bridles or more technically a spring can be used in the same way to force a boat to point into the sea rather than into the wind, but it does put more weight onto the anchor cable because of increased windage.
| CRUCIAL STUFF! |
|
Safety Equipment and the skippers briefing
I never really know where to start this subject. A soldering iron and the knowledge to use it is safety equipment if the radio has a dry joint (bad connection).
I will try to stick to the subjects that you need to cover in a safety briefing before sailing
When packing a sea bag what do I take? We don’t have endless storage room
so it has to be minimal.
With new crew it is a good idea to have a list like this one so they don't
forget anything and do not bring far too much!!
I’ll start at the top!
- Sun hat, sunglasses, sun and moisture cream Lip protection!!. The sea reflects the sun and sunburn; glare and dehydration are major problems to the unwary.
- A woolly hat. A large percentage of body heat is lost through the head.
- A scarf stops seawater going down your neck!
- Thermal underwear. It does get very cold out there and you might be out a lot longer than planned. So take plenty of layers of easy-dry clothing.
- Gloves if you have soft hands. Rope burns are very serious.
- Woolly socks. Fibreglass decks are not very warm.
- Shoes with non-marking, non-slip soles.
- Wellington boots again need to be non-marking and non-slip.
- I take wool slippers for below decks! It’s a real luxury!
Next is a waterproof layer on top. There are a wide variety of foul weather clothes available and they nearly all cost the earth! but staying dry is very important. The body does not need much but it needs –
- Shelter from wind and rain,
- regular food and water,
- sleep,
- heat and light.
If it gets them it will be fine, if not it isn't.
I also take a washing kit, towels and a head torch.
SAFETY KIT
A crucial part of your briefing will be the explanation of Life Jacket, Harness and harness line. There lots of different types with advantages and disadvantages.
Life jackets
There are three main types:
- Solid buoyancy,
- Inflatable,
- Both.
All should have a light, a whistle and reflective tape.
| Solid buoyancy jackets will always keep you afloat if you go over the side, and some will keep you face up if you are unconscious. They are very difficult to move about in and therefore you are likely not to wear them. Some yachts carry these as spares if they carry inflatables which may burst or leak. | 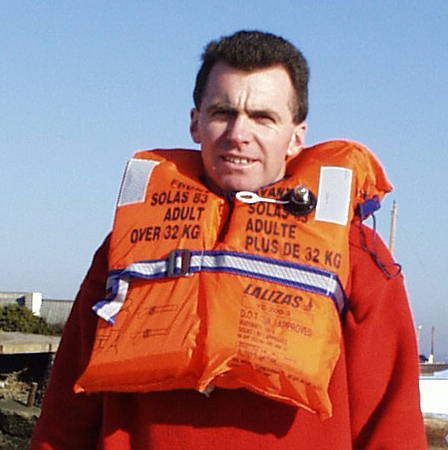 |
| Inflatable jackets when inflated will
turn you on your back and keep you afloat. They are susceptible to
puncture and need regular servicing. They are easy to wear and do not get
in the way. I live in mine at sea. It is crucial if you have this type aboard, that the crew know what is inside the thing! Strip one and inflate it during your briefing. I am always amazed when someone comes aboard with their own lifejacket and then does not know which side its oral inflator is, as he has never seen inside the cover!
|
 |
Some of these have gas inflation as well as the
old oral inflation tube types. They even have automatic inflation systems
that will activate the gas cylinder when you fall in. Be careful with
these though. I got rid of mine because it was for ever going off
accidently!. This one has an
integral harness and crotch strap.
|
 |
| Solid and Inflatable. Lifejackets that try to be both inflatables and solid buoyancy jackets, I find do neither job very well. They are cumbersome and do not have enough initial buoyancy until inflated. |  |
Notice all the reflective tape. This is very important for locating someone in the sea at night.
Harnesses
There are lots of types on the market. Chest harnesses are the most common. Most have fully adjustable shoulder straps as well as chest strap and crotch straps. Some do not, so be careful what you use and what you buy. It is quite possible to fall out of a badly fitting harness, particularly if it does not have a crotch strap, which some don’t. Your crew will put on a coat over a lifejacket, a harness over a lifejacket etc. Watch them!
Harness lines Issue them with lifejacket and harness during your briefing. It stops the crew going to sleep, half way through the brief if you get them to find them and put them on. Be careful where the crew clip on. They often try to attach them selves to guard rails, which are held at both ends with string lashings and running rigging, which as you know, could be released at any time! |
|
| This harness line has a safety catch so the clip cannot be undone accidentally Some clips are not so protected. |  |
| CRUCIAL STUFF! |
|
GENERAL BOAT SAFETY EQUIPMENT
We all know all the kit, but what about getting the casualty back aboard?
Once we have managed to get back to the man, then we may have the problem of
lifting him back aboard if he cannot help himself, or if the "topsides"
are too high. There must be a system in place for this eventuality. Some boats
use a spare halyard to hoist the man back aboard. Others use the boom, "Topping
lift" and the main sheet.
Most, I have found have no system in place.
Have a system AND know it works because you’ve
tested it!
Do a man over board drill on every cruise. Even a day trip! at least once.
Yachtmaster instructors do hundreds of them in a season and most don't miss, but
ask one to do it on their first trip out in the spring.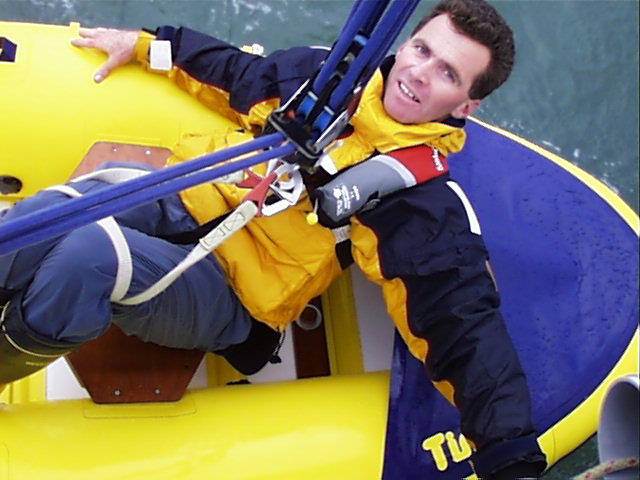 I bet they miss him!
After a winter off, even they need to practice. This means that most yachtsman
must do them regularly to stand any chance of rescuing a person in the water.
Don't just chuck something over then sail back and pick it up. Choose a
sheltered spot and launch the dinghy. Have a crewman play dead in it (clip him
to the yacht) and get the others to recover him. Its harder than it looks and
well worth practicing.
I bet they miss him!
After a winter off, even they need to practice. This means that most yachtsman
must do them regularly to stand any chance of rescuing a person in the water.
Don't just chuck something over then sail back and pick it up. Choose a
sheltered spot and launch the dinghy. Have a crewman play dead in it (clip him
to the yacht) and get the others to recover him. Its harder than it looks and
well worth practicing.
A couple of points that are crucial here are:-
1, Get the boom high on the Topping Lift or you will not be able to get the
casualty over the guard rails.
2, Make sure the Topping Lift is strong enough. (It should go around the boom
and not clip to the casting spacers on
the boom end fitting. They will snap!
I have just shown you a common MOB light. They are absolutely useless! Every
time we do MOB drills in the dark, we loose them. There is only one way to find
someone in the sea with light at night and that is with a white illumination
parachute flare You don't carry them? Get some!
Be aware that if someone has be immersed in the sea at 50º latitude for over
ten minutes, they will be hypothermic. If they are vertical in the water, the
legs will be under water pressure and therefore the arteries in the legs will be
contracted both because of this pressure and because in Hypothermia, the bodies
self help shut down procedures contract arteries to slow blood flow and
therefore conserve heat.
As you lift this casualty out of the water, the pressure will reduce around the
lower limbs and the arteries will dilate. This will allow warm blood out of the
heart and more importantly therefore allow cold blood in! This can make
the difference between life and death. So try to lift horizontally. This
is easily achieved by simply wrapping a harness life around the knees and then
clipping it to the chest attachment, or by parbuckling the casualty aboard.
The dinghy is very much a part of your safety kit in this respect. It is much easier to get a tired casualty into a dinghy than to haul him back aboard. At least when he is in the dinghy, he is out of the sea, relatively safe and you can administer first aid if necessary.
The Liferaft is another essential item. It is never used in most cases, but if you do have to abandon the boat (a last resort) then you need to know how it works and how to get in it.
There is a one day Sea Survival course which covers this subject in depth.
 Liferafts
need to be serviced once per year, as they live on deck and water can sometimes
get into them which could damage their equipment There are also various
internals which need periodic replacement. eg the repair kit glue or torch
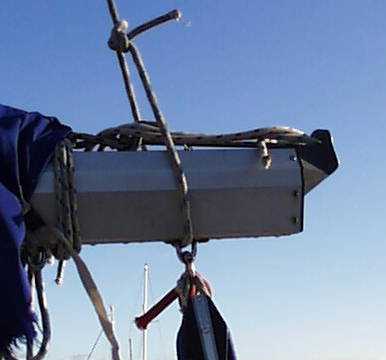
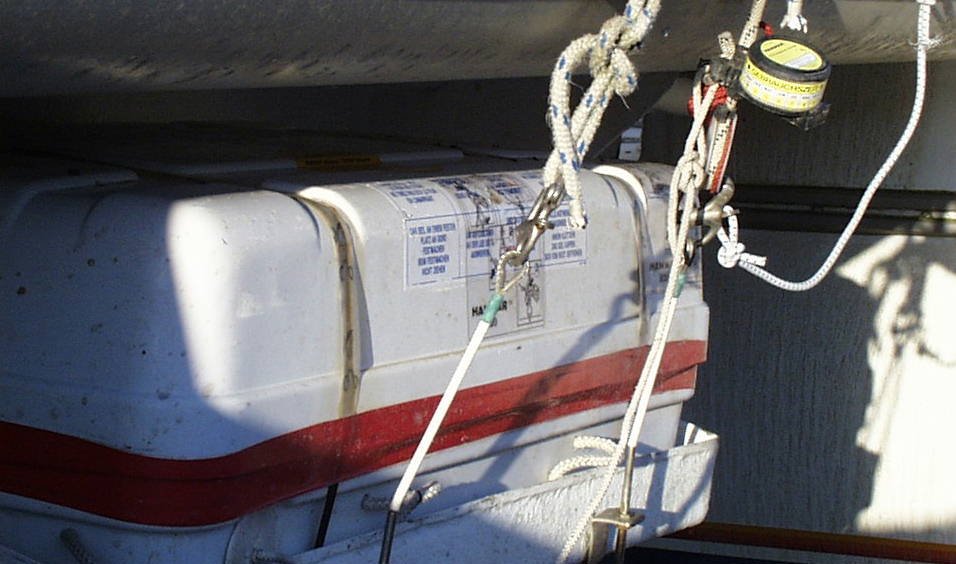
batteries. They are held to the deck
using a quick release clip and sometimes have a hydrostatic release. If the boat
sinks, this device is "supposed" to release the raft, which will then inflate.
Be careful about deciding to use one of these devices. We have had one decide to
release the raft when crossing Ravenglass bar! They work like this. When the
device is between 2 and 4 meters under water, the water pressure is such that
the hydrostatic release operates and a sharp blade cuts the lashings.
Liferafts
need to be serviced once per year, as they live on deck and water can sometimes
get into them which could damage their equipment There are also various
internals which need periodic replacement. eg the repair kit glue or torch
batteries. They are held to the deck
using a quick release clip and sometimes have a hydrostatic release. If the boat
sinks, this device is "supposed" to release the raft, which will then inflate.
Be careful about deciding to use one of these devices. We have had one decide to
release the raft when crossing Ravenglass bar! They work like this. When the
device is between 2 and 4 meters under water, the water pressure is such that
the hydrostatic release operates and a sharp blade cuts the lashings.
Normally you would inflate the raft before the vessel goes down, but only when you are sure that it will sink imminently. Stay with the boat even if it is a burnt out, mastless, upside down wreck! Its still bigger, stronger and has more kit than a liferaft. Have a look at a few when you next visit a boat show and see how much they resemble the kids inflatable paddling pools that cost a tenner from Woolworths!
Any way if you must leave the boat:-
After unclipping the raft, throw it in the sea and then pull on the painter.
This will release a compressed air cartridge and the raft will inflate.
(Sometimes you have to pull a lot of painter out of the raft before coming to
the cartridge. 10 meters).
Get into the raft straight away. They commonly inflate upside down and someone will need to right the thing much as you would a sailing dinghy. This person will therefore get wet, cold and will not be able to climb into the liferaft. As soon as possible, two crew board the raft and then haul the swimmer in by grabbing him around the waist and pulling him up and into the raft. This takes practice. Do a course.
Try to stay dry. Read the instructions in
the raft. If you’ve lost your skipper, pick a leader. Stream the drogue (this
helps to stabilise the raft) Take seasickness pills and run a watch system for
keeping a lookout, bailing, nursing casualties etc. Positive thought will keep
you alive!
If possible, take with you
- The inflatable dinghy and pump. Far stronger than the liferaft, it will not fall apart and you can row it!
- Water,
- flares,
- EPIRB,
- Hand held VHF
- Sleeping bags (they will get soaked, but most are made of hollow fill these days and will keep you warm even when wet).
- TPA's (thermal protective aids) Lots of life rafts carry these, but they could be kept in a grab bag. They are waterproof survival bags and help to prevent hypothermia.
and WEAR LIFEJACKETS!
 Make
sure your crew
realise that Fire
is a major hazard at sea. You cannot just "leave the building!" We have to put it out! We are armed with an awful lot of seawater,
which is a great fire extinguisher when coupled to a scared man with a
bucket! We also have fire extinguishers mounted around the boat in strategic
places. –
Make
sure your crew
realise that Fire
is a major hazard at sea. You cannot just "leave the building!" We have to put it out! We are armed with an awful lot of seawater,
which is a great fire extinguisher when coupled to a scared man with a
bucket! We also have fire extinguishers mounted around the boat in strategic
places. –
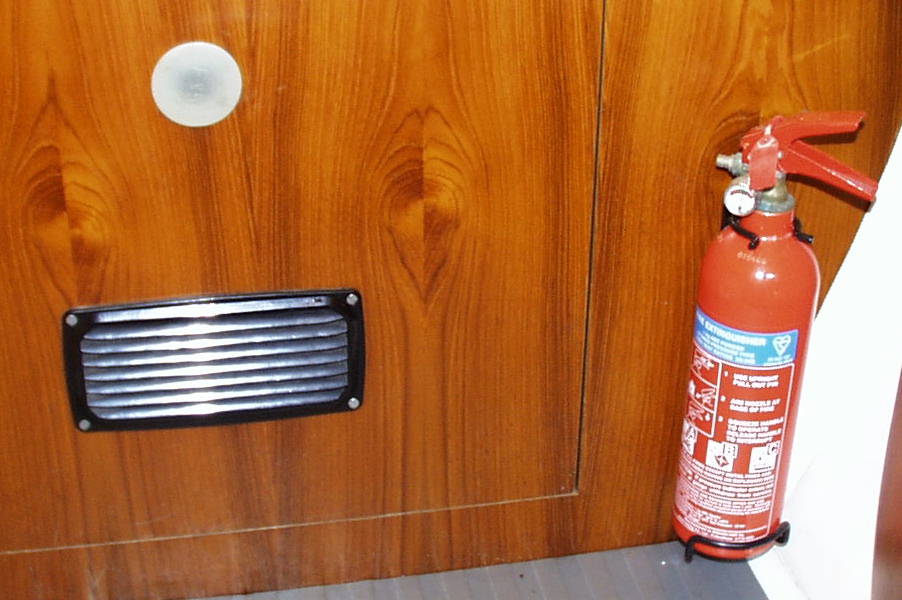
- At exits
- In sleeping accommodation
- In engine spaces.
In the engine space, we tend to have automatic extinguishers that operate if the temperature goes above a certain point. Sometimes there will be an extinguisher just outside the space, which can be operated into the engine space through a bung like this one, without letting more oxygen in.
All fire extinguishers need to be able to cope with the type of fires we might expect to find on board. With twelve-volt electrical systems we can use Foam, Dry Powder, Halon, and CO2 safely. On our boats, we carry all dry powder extinguishers, as they will work on all materials. They do however make a terrible mess and the powder is very corrosive afterwards.
Fire blankets are also very important to carry, both for smothering galley fires and for wrapping people in if they catch fire or need to run through fire to escape. frying pan fires can be stopped instantly by making sure the pan lid is always on the work surface when frying! Quite simple and much faster than a blanket, this procedure will start to instil in your crew that forward thinking prevents most accidents.
Butane gas also deserves a mention while I am on this subject. Most boat cookers, some cabin heaters and some water heaters use Butane gas. It is very convenient, cheap and efficient. It is also highly explosive! And if you breathe it in you asphyxiate !
Modern regulations ensure that on new boats the gas bottles are kept in an on-deck locker which drains over the side in the event of a leak. The pipe work must be up to industry standard, clipped up properly and regularly checked. The appliances must have cut-off valve next to them. These should be clearly marked and should always be turned off after use. Most also have flame failure devices. These will automatically turn off the gas if the flame blows out. Ventilation is crucial when burning Butane and Propane gas, to prevent a build up of Carbon Monoxide. Many new appliances incorporate low oxygen cutouts for this reason.
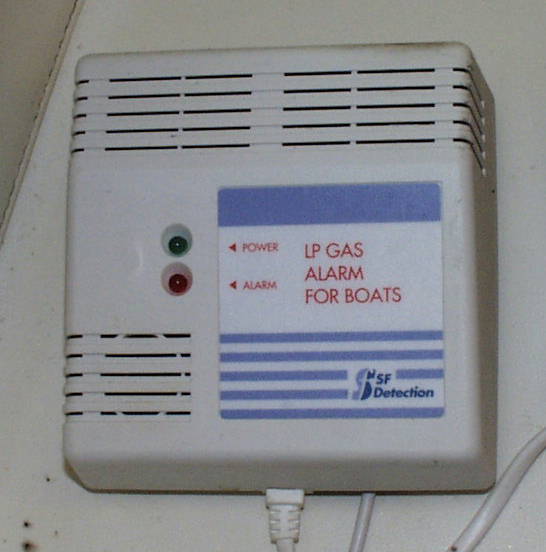 A
gas detector is a good idea. Gas is heavier than air and will sink to the cabin
sole (floor) and then down into the bilge. Put the detector heads on the sole
under the appliance. Multiple sensor detectors are available. They tend to
fail,
so always check the sensors before each trip as part of your briefing. An
extinguished gas cigarette lighter held next to the detector head should set off
the alarm.
A
gas detector is a good idea. Gas is heavier than air and will sink to the cabin
sole (floor) and then down into the bilge. Put the detector heads on the sole
under the appliance. Multiple sensor detectors are available. They tend to
fail,
so always check the sensors before each trip as part of your briefing. An
extinguished gas cigarette lighter held next to the detector head should set off
the alarm.
You can smell gas
because the manufacturers add a smell to it when it is bottled. If you smell
any, get out of the accommodation. This gives you fresh air and you can turn off the
gas at the bottle. Next make sure no one touches electrical switches (on or off)
They produce small sparks and BOOM! Open hatches and vents. Wake up sleeping
people and get them out. You can remove the gas by pumping the bilge pumps. They
will suck air (gas) as well as water.
Some electric pumps use impellers rather than diaphragms therefore will not suck air Putting some water back in the bilge is helpful so I’m told, as gas is soluble in water.
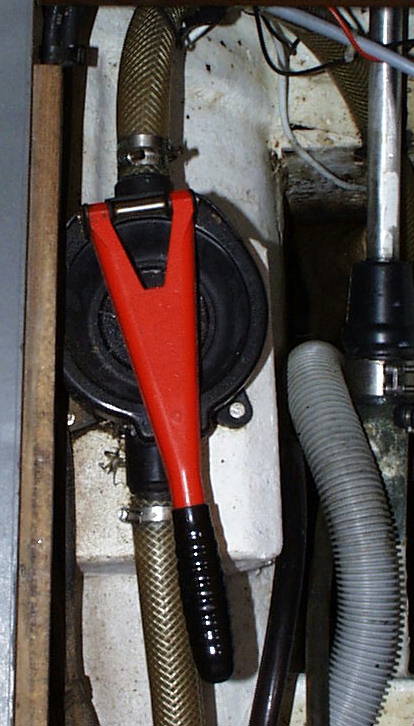
Again a scared man with a bucket makes a good one, so all boats carry strong buckets with rope handles and a lanyard.
There should be pumps, which are operated from below deck and pumps
operated from on deck. They can be manual like these, or electrical. Some
electrical pumps are submersible. The whole body of the pump lives in the bilge.
Other electrical pumps are remote from the bilge. Either way, electrical pumps
give trouble and you should have manual  backups. These
manual pumps are usually
diaphragm pumps.
backups. These
manual pumps are usually
diaphragm pumps.
I'm sure you know all this but do you carry spare diaphragms and know how to change one!
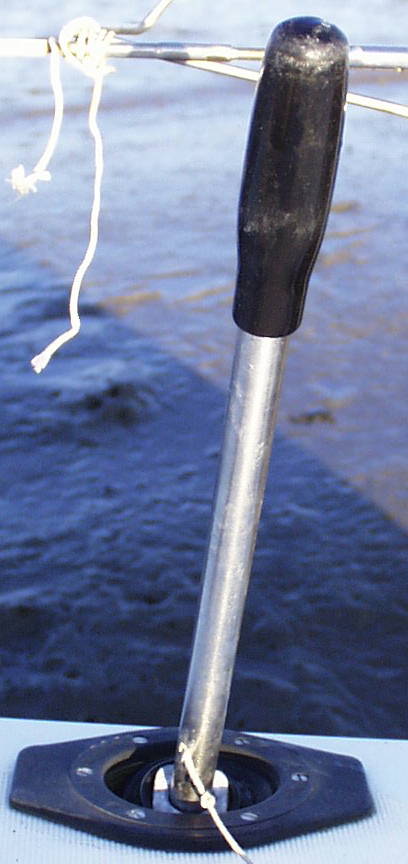
Seacocks and Skin Fittings
 These taps
are made from bronze traditionally, but increasingly I see plastic ones. They
need to be maintained otherwise they corrode and snap off. This is of course
pretty serious! Well-found boats have bungs tied to these seacocks for this
eventuality. Always find out where all seacocks are and know how to access them.
These taps
are made from bronze traditionally, but increasingly I see plastic ones. They
need to be maintained otherwise they corrode and snap off. This is of course
pretty serious! Well-found boats have bungs tied to these seacocks for this
eventuality. Always find out where all seacocks are and know how to access them.
They also block!
If the builder has fitted an elbow to the seacock then get rid of it! With no
elbow, you can simply remove the plastic pipe and having opened the valve, push
the handle of a wooden spoon or the like, down and out
through the skin fitting to remove the blockage (weed mud , sand, toilet paper
or worse!) But if there is an elbow you are in trouble. You could go for a swim
if you are carrying the right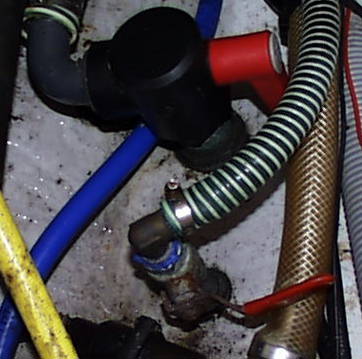 kit, but even then you can only push the blockage
back in.
kit, but even then you can only push the blockage
back in.
This one could be an engine seacock and that means no engine! Get rid of elbows!!!
| CRUCIAL STUFF! |
Make sure your crew know the positions of and how to use:
|
We should be as self sufficient on the sea as possible, carrying every thing we might need, both to make repairs to the boat and ourselves, as well as all conceivable consumables.
If we are fully prepared for all eventualities then we will never need to send out a distress message. I’m afraid that with all the forethought I put into sailing and all my experience, I am a long way from there! We can all make mistakes and no matter how strong you build it, the sea can break it.
There are various ways of sending a distress message, from waving your arms to sophisticated satellite systems.
Until recently, the best way of sending a distress message was by sending a voice MAYDAY call on the VHF radio. MF radios are used further off shore. VHF is a simplex system, which means that you send and receive on the same channel. This means that if you are transmitting you cannot hear anyone else.
A good VHF on a yacht can transmit for about 20 - 25 miles, if the antenna is at the masthead. Very High Frequency radio waves are line of sight.
 The curvature of
the earth can stop the transmitted wave getting to its destination. Of course,
other vessels can also hear the distress message and will act on it.
The curvature of
the earth can stop the transmitted wave getting to its destination. Of course,
other vessels can also hear the distress message and will act on it.
If you hear a Distress call, write it down! You might be the only one
to hear it.
If this is the case, no one else will answer it and you must.
You need to do two things,
- Contact the casualty and let them know that you are on your way to them.
- Send a Mayday Relay call.
This call sends the casualty’s information to all stations who can hear
you. In this way, a message can be passed from boat to boat until it reaches the
emergency services. Even in a coastal situation this happens.
I have had to
do a Mayday Relay call within a harbour, as the casualty’s signal was blocked
by hills.
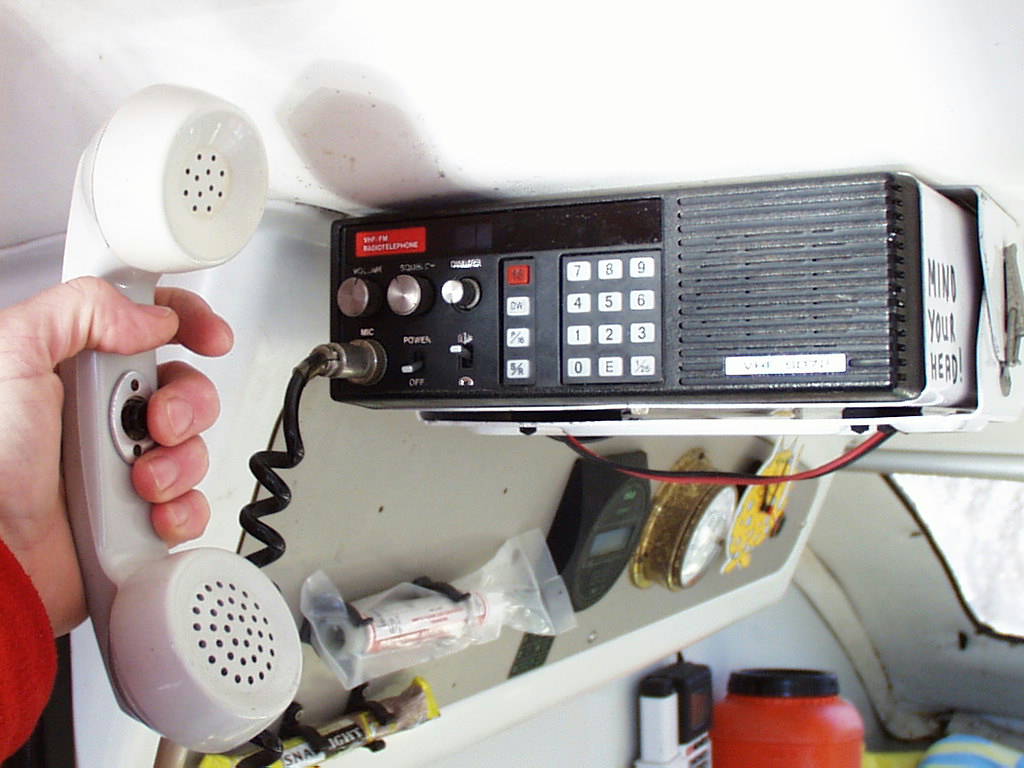
Here is an example of a May Day call from one of our Boats. Some of the instructions are particular to "Blue Moon" All vessels should have instructions like this, posted next to the VHF.
VHF RADIO DISTRESS MESSAGE
Call sign MIKE XRAY DELTA NOVEMBER SIX
1, BATTERY SWITCHES ON.
2, VHF PANEL SWITCH ON.
3, SWITCH ON VHF AT VOLUME SWITCH AND TURN UP VOLUME.
4, TURN SQUELCH KNOB ANTI-CLOCKWISE UNTIL NOISE IS HEARD, NOW TURN CLOCKWISE UNTIL NOISE STOPS. (DO NOT TURN MORE
THAN NECESSARY)
5, PRESS BUTTON MARKED CH16
NOW TAKE TELEPHONE LIKE MICROPHONE, HOLD CLOSE TO MOUTH AND EAR. DEPRESS TRANSMIT KEY (ON HANDLE) AND SAY: -
MAYDAY MAYDAY MAYDAY
THIS IS THE SAILING CATAMARAN BLUE MOON, BLUE MOON, BLUE MOON.
MAYDAY BLUE MOON.
*if DSC alert has been sent. Give mmsi numberPOSITION IS: -
A distance and a bearing from a charted object OR your latitude and longitude. (GPS could be useful here)THERE ARE .......... PERSONS ONBOARD
THEN A BRIEF DESCRIPTION OF YOUR SITUATION AND
ASSISTANCE REQUIRED
OVER.
NOW LET GO OF THE TRANSMIT KEY.
LISTEN. IF NO ANSWER TRY AGAIN.
NB This message is only used when there is imminent danger to life. E.g., man overboard, fire, or sinking.
IN SITUATIONS WHERE LIFE IS NOT IMMINENTLY THREATENED USE: -
PAN PAN PAN PAN PAN PAN.
ALL STATIONS ALL STATIONS ALL STATIONS.
THIS IS THE SAILING CATAMARAN BLUE MOON, BLUE MOON, BLUE MOON.
PAN PAN BLUE MOON
POSITION IS
(as in mayday message above)THERE ARE ........... PERSONS ON BOARD.
THEN A BRIEF DESCRIPTION OF YOUR SITUATION AND
ASSISTANCE REQUIRED
OVER.
NOW LET GO OF TRANSMIT KEY.
LISTEN, IF NO REPLY TRY AGAIN.
There are problems with the voice method of sending out distress messages. If another station sends at the same time, your signal can be blotted out. Channel 16 is used for all calling and therefore it is very busy. Everyone listens to channel 16. Vessels contact others using 16, then they switch to another "working channel" to have a brief conversation.
You should have this kind of crib sheet (above) posted near the VHF on your boat. Your guests aboard might not be familiar with your radio or radio language and you may not be able to make the call yourself. They may well have mobile phones these days and they could obviously alert the Coastguard by dialling the emergency number. This is better than nothing but has two disadvantages.
- Mobiles have a limited range and at present the sea is only accidentally covered.
- If you send a distress message by phone, it is received by only one
station, but others might be in a much closer and therefore quicker position
to render assistance.
Remember that with the VHF you transmit to anyone who has there set switched
on. Keep your VHF switched on and set to channel 16!
| CRUCIAL STUFF! |
|
There is a new Distress procedure and new equipment which is available and in use today. It is new in Yachting and most pleasure yachtsmen do not carry it at time of writing. However it is widely used and is mandatory for vessels over 300 tons or vessels carrying more than 12 passengers.
It is called GMDSS: Global Marine Distress Safety System. This is a network
of the world’s Search and rescue services. Telephone, VHF, and Satellite
systems link them together.
The components that make up GMDSS are
To use VHF you must have an operators licence, which means a two day course with an exam. Most sailing schools run them. If you already have a VHF operators licence which did not cover GMDSS then you can do a one day up date.
The old "Channel 16" method of sending distress or urgency calls is being replaced and so are the radios. With the new sets, "Digital select calling" (DSC radios). The information is sent out on channel 70. This channel is not to be used for voice transmissions.
Here's how it works.
If you ever need to send out a Mayday call with a DSC radio, you pick one
of several options (Buttons on your set) eg, fire, piracy, sinking. Then either
enter your position manually or if the GPS and radio are interlinked (normal)
just open a flap which protects the emergency button and press it.
You have sent out a distress call on channel 70. You now need to back it
up by sending a normal Mayday on channel 16 as not every one who might be
able to help has DSC! and not all DSC stations get the full story from your
channel 70 call. Your set will keep transmitting the call until it is answered
by a class " A" DSC controller (coast guard)
Any DSC radio that receives your channel 70 transmission with give an audible
warning and display the senders MMSI (Marine mobile service
identity) like a phone number! A nine digit number which identifies the registered
radio.
It will also display the time of the transmission. It can, but might not
display the nature of distress and the position. It will not display the vessels
name. The receiving stations set will be changed to listen to channel 16 automatically.
They can listen to your voice call.
DSC radios are not only for better reception of urgency calls. They can also be used rather like you can a telephone. You can send a channel 70 call to a ship (if you know the MMSI) phone number. As part of this transmission you would also indicate the intership channel that should be used eg 6. The ships set will give an audible warning and they will call you back on channel 6. Of course you need to know the phone number first!? Apparently there is a directory.
There is a temporary down side to the introduction of DSC. Ships have stopped keeping a dedicated watch on channel 16. For example, you are more likely to raise a ship in a collision situation on channel 13 which is the bridge to bridge comms channel.
Emergency Position Indicating Radio BeaconsThese are carried aboard and some will even float free if the boat sinks and automatically operate. There are two types. 406 MHz transmitters and 121.5MHz.
The 406MHz EPIRB’s also carry a 121.5 MHz transmitter. They must be registered with the Maritime and Coastguard Agency (EPIRB Registry,MCA Southern Region, Pendennis Point, Castle drive, Falmouth TR11 4WZ) and if transferred to another vessel they must be re-registered. They send a coded message to satellite. The satellite either sends it straight back down to a ground based station, or it stores the information until it is in the correct position to send it back. (These satellites can only see about a 4000mile diameter chunk of the earth at one time, but are in low orbit and move relative to the earth, therefore one of the 35 ground receiving stations, in 19 countries comes into view pretty quickly (about 40 minutes max.) The information is then sent out to a mission control centre which in turn passes it to the local RCC Rescue Control Centre, who organise the rescue craft / Aircraft.
First, a rough position is gained from the 406MHz transmission, then direction finding equipment, homes in on the 121.5 transmissions from the EPIRB to locate the casualty. That sounds pretty drawn out, but recently Tony Bullimore was plucked out of the Southern Ocean, 1000 miles from land by the use of this system!
121.5MHz EPIRB’s can transmit to satellite but it is not recognised as a reliable system.
They transmit along a line of sight. The transmission will be picked up both by local RCC’s and commercial and military aircraft, as this is their distress frequency.
There is change in the wind with EPIRB's. Although the above is the system in place at present. There is a move to phase out the 121.5 transmitters by 2009. They will be replaced by EPIRBS which will transmit a GPS coordinate. This is much more accurate than location by radio direction finding. There are a few 406 EPIRB's on the market already which carry this method of location. They are known as GPS EPIRB'S
Search
and rescue transponders. transmit a signal which will show up on any radar
screen. The sart will passively listen for radar signals for up to 96 hours.
when it picks up a signal it transmits its own signal.
On the searching vessel this will show as a series of twelve dots in a radial
line. Sarts have a limited range and should be deployed at least 1 meter above
the sea. They are typically about the size of a hand held VHF.
NAVTEX.
Is rather like an on board fax machine. It keeps receiving information in the form of either printed paper or on screen. It receives regular information on weather, navigation warnings and distress calls. So if you carry a navtex ( all commercial ships must do) then you will receive information on distress calls.
INMARSAT
Is a satellite telephone system and can therefore send distress calls. Its satellites will also receive information from EPIRB's but I believe only up to 70 degrees latitude. i doubt any of us are going to to be in distress that far north or south. Brr!
There are the other internationally recognised distress signals, which are not
quite so sophisticated and I am sure you know about them, but lets revise them.
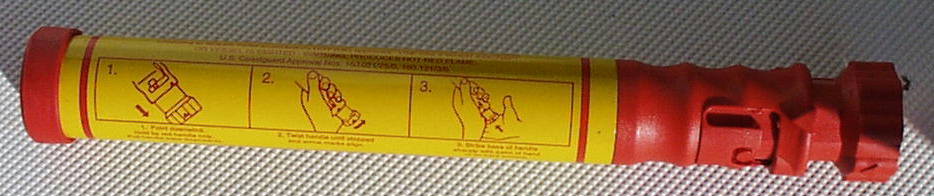
 FLARES
Red and orange flares are distress flares. There are three main types. They are not fireworks! And should not be used as such. They should be kept in a waterproof box in a readily accessible position. If the box is made of plastic it will suffer less from internal condensation. We also keep a hand held VHF in this box which would go with us if we had to abandon ship. Flares go out of date every 3 to four years and need replacing.
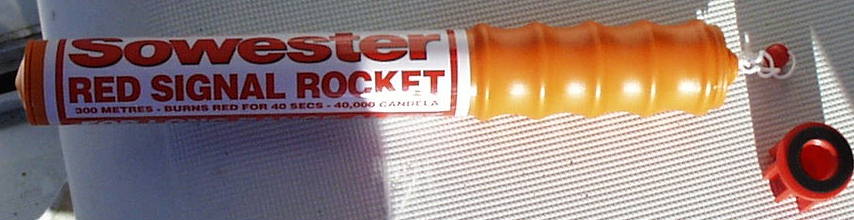 Parachute
flares can be seen from a distance of up to 25 miles in good weather and
reach a height of about 300 metres, if fired correctly. They should be used
during the day or night and fired in groups of two. (As soon as the first goes
out fire the second)
Parachute
flares can be seen from a distance of up to 25 miles in good weather and
reach a height of about 300 metres, if fired correctly. They should be used
during the day or night and fired in groups of two. (As soon as the first goes
out fire the second)
Fire them vertically and slightly down wind. (They are designed to climb into it). If you have a very low cloud base, then fire them down wind, at about 45° from vertical.
 Hand
held Pin points. These
flares are visible for up to 4 miles and should be used day or night. They are
particularly useful to pinpoint your position accurately. They are very bright.
Do not look at the flame, as this will cause night blindness for some minutes.
You do not need to be blind as well as sinking! Hold at arm’s length and point
away from you. Do not hold vertically. Wear a glove if you have time or pull
your sleeve down to produce a makeshift one. They spit molten material and you
will drop the flare if it lands on your bare flesh. Hold the flare over the side
just in case.
Hand
held Pin points. These
flares are visible for up to 4 miles and should be used day or night. They are
particularly useful to pinpoint your position accurately. They are very bright.
Do not look at the flame, as this will cause night blindness for some minutes.
You do not need to be blind as well as sinking! Hold at arm’s length and point
away from you. Do not hold vertically. Wear a glove if you have time or pull
your sleeve down to produce a makeshift one. They spit molten material and you
will drop the flare if it lands on your bare flesh. Hold the flare over the side
just in case.
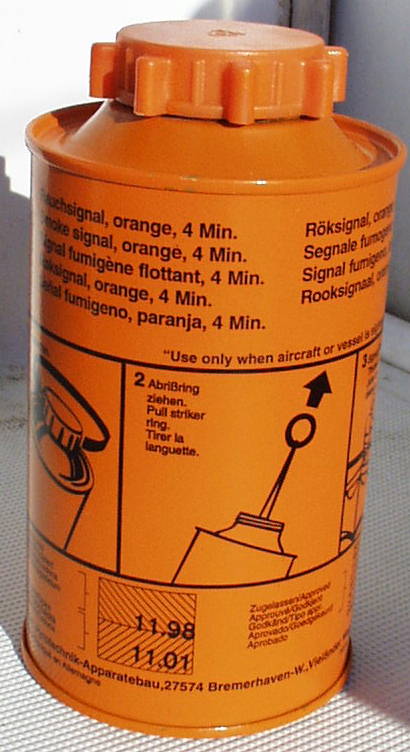 Orange Smoke flares
are used in daylight to pinpoint your position. They are particularly useful when the search for you is being carried out by helicopter. This one is a Buoyant one. You operate it, then throw it in the sea. There are also hand held smoke flares.
Two more types of flare that all boats should carry are white illuminating parachute flares. This is the only way of lighting up a large area of sea if you have lost someone overboard in the dark.
White pinpoint flares. These are for attracting attention in collision situations.
Always show the crew the instructions on the flares as part of your briefing. There are lots of different makes with different operating procedures. If you leave reading the instructions until you need them, it will be dark and the battery torch will be wet! Oh, keep a glove in the box.
Exercise 33
OTHER INTERNATIONALLY RECOGNISED DISTRESS SIGNALS
 Raising and
lowering of outstretched arms
Raising and
lowering of outstretched arms
All these are a last resort if more up to date methods have failed.
LOGGING WITH THE COASTGUARD
There is a system in place which will alert other craft if your vessel is overdue at its destination. It is organised by the UK Coastguard and is called "The Yacht and Boat Safety Scheme". Owners register their boats with their local Coastguard with a form "CG66", available from Coastguard offices. (Just give them a ring and they will send one out to you). Fill in the details of your vessel size, colour, safety gear carried, and next of kin contact numbers, then send it back. The Coastguard will put all this information into their networked computer system, so any Coastguard can access it any time.
When you make a passage. Call the Coastguard and tell them that you are registered with them. Tell them where you are going and what time you expect to arrive.
If you go overdue, your shore contacts can call the Coastguard and then the coastguard will put out a Pan Pan call to all stations, requesting information on your vessels whereabouts. If you have had trouble, they know where you were going from and to, so can make a search of the area. So, don’t forget to call home when you get in!
HELICOPTER RESCUE
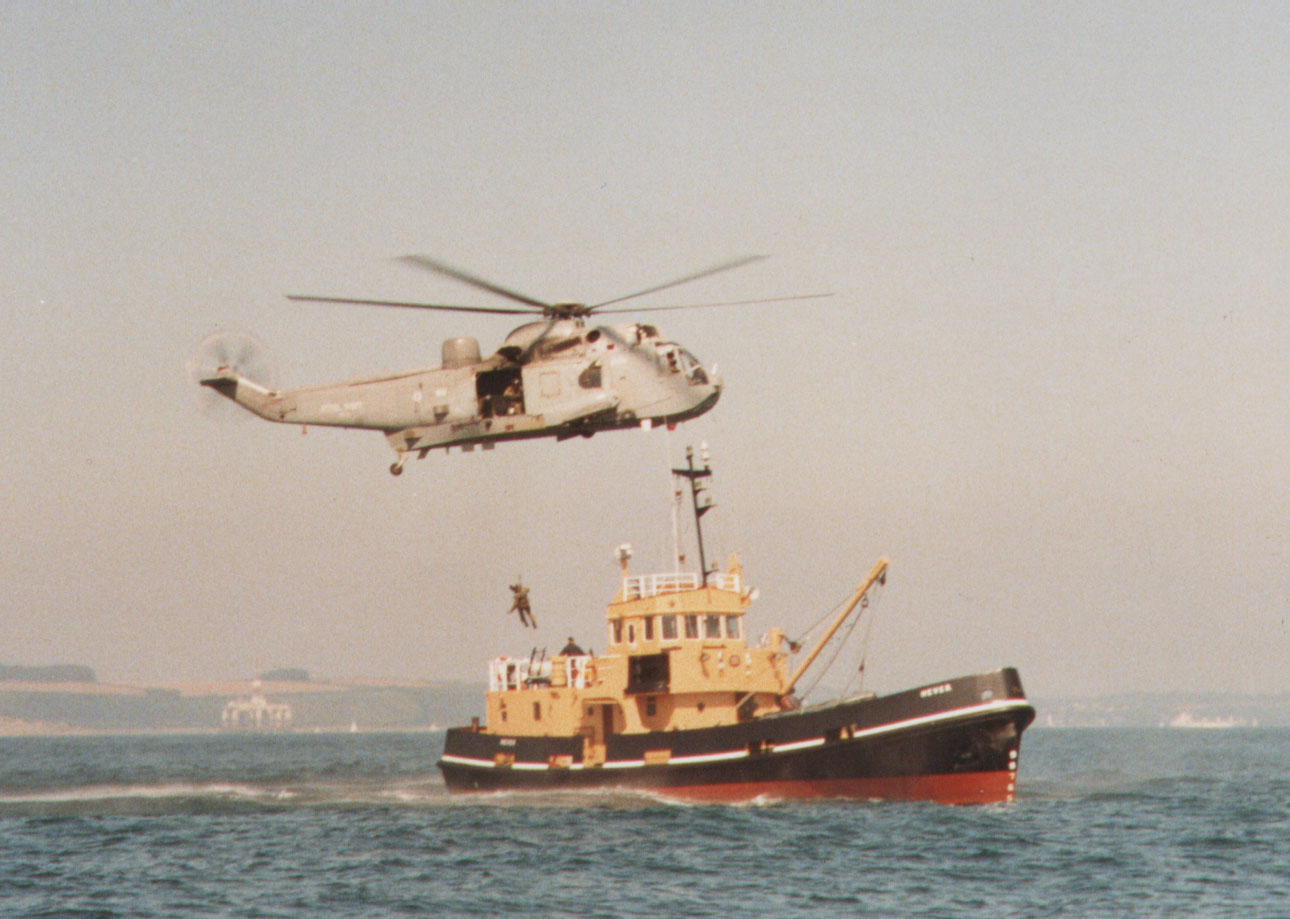 Right;
we have got our distress message out and it has been received. The emergency
services have launched a Helicopter to come and remove our injured crewman, for
example.
Right;
we have got our distress message out and it has been received. The emergency
services have launched a Helicopter to come and remove our injured crewman, for
example.
There is a fairly set procedure for this rescue, if your vessel is still able to move: - "High line transfer"
First, get all unnecessary gear off the deck and lash down the boom on the Starboard side, if you have an operational engine. Everyone should be wearing and using a harness.
Sea-king helicopters are very disorienting when they are on top of you. Looking up at it might make you lose your balance.
Listen to the VHF. The helicopter will call you. He might not be able to see you so have a smoke or pinpoint flare ready. (Not a parachute!)
The Helicopter will give you a course to steer, which will be with the wind
fine on your port bow. This is because to undergo the rescue the Helicopter
needs to point into the wind. The Pilot sits on the starboard side so can only
see your vessel through his starboard window. He needs to point head to wind to
give him maximum fuel economy and manoeuvrability. The winch man is also on the
starboard side of the aircraft.
A light line will be passed down to the yacht, weighted by a sandbag. When it has touched the boat, put it in a container, eg a bucket, so that as the helicopter goes up and down you can keep the slack tidy. Do not cleat off this line!
A Diver will come down to the boat on a winch wire and the light line is
attached to him.
It is difficult and dangerous for the pilot to position the diver so as he can jump directly aboard because of the swinging mast. When he is at sea level he will signal you to pull him towards you. Do not grab him! The winch wire has a considerable static charge, which could give you a severe electric shock. The diver will earth the wire, then come aboard. Helicopter crews are extremely competent, in my experience and they will take over the situation from then on in. Let them: it’s their job and they are better at it than us! No, I have never been rescued, but we practice on practical courses when convenient to the Helicopter crews.
Contrary to this gloom and doom that I’ve been on about, most crews get by without all this! But they forget about safety as soon as they want to go to the pub!
The major cause of death in yachting is the misuse of the yacht’s tender (small boat). For some strange reason, yachtsmen are embarrassed about walking into the pub with a life jacket?
When using the dinghy, it is really very simple.
- Always wear a life jacket.
- Always take oars and know how to use them in a strong wind or tide. Most yachtsman use small outboard engines, but these are very temperamental and often breakdown.
- Always take the pump if it is an inflatable tender.
- Always take a torch if it might get dark while you are out on the water. Remember, all vessels no matter how big, must carry a white light.
- Do not overload the dinghy. It is not uncommon for a yacht crew to be 5 or more. Most dinghies can only take 4 small adults in very good weather conditions. Make two trips!
- Consider a water taxi . Lots of harbours offer this service. It is cheap when compared to the horrors of drowning when drunk in charge of a tender.
Since starting my sailing school, I know of two ex-students who have died in dinghy accidents.
As I have already said in the weather module, fog is very frightening and can be dangerous on the water. Here are a few tips to keep us as safe as possible.
Why do we get fog? – see Module 4; Weather
Firstly, as always, get the weather and if fog is forecast, work that into your passage planning. Ask yourself;
- Can I get into that harbour in the fog?
- Do I really want to cross the traffic separation scheme!
- Do I really want to go out at all?!
If you see fog coming down, or the visibility reducing at any time.
- Get a fix! And note the time, log and course steered.
- Consider making a new navigational plan to get you out of traffic areas and if safe to do so, into shallow water and anchor. Large ships do not venture into 5 metres of water unless very necessary!
- Turn on the VHF and keep a listening watch.
- Use the Radar if you have one. (It is an International rule that if you have operational Radar, you must use it in fog.)
- Get all crew into life jackets and harnesses. Clip on all on-deck crew. Warn them that they will have to be able to unclip quickly should the boat be run down.
- Have the tender ready for immediate use. Inflate the dinghy. If the boat is run down, you’ll need it very fast.
- Turn on correct Navigation lights.
- Make the appropriate Fog signal as best you can. Bear in mind however that big ships cannot hear it!
- A sailing boat underway should make a sound signal, not less than every two minutes of one long blast then two short blasts Daah dit dit
- A power driven vessel sounds one long blast instead. Daah
- Have off watch crew standing by. If they must sleep then have them catnap in the saloon in their safety gear.
 Hoist
a radar reflector if you do not have one permanently mounted. These devices
make the yacht more visible to radar. Yachts are generally very poor radar
targets.
Hoist
a radar reflector if you do not have one permanently mounted. These devices
make the yacht more visible to radar. Yachts are generally very poor radar
targets.- Post lookouts up forward where they can see, and more importantly, where they can hear. It is cold up there and looking into the fog can make you see things, so change the lookouts regularly.
- If you are under power. Slow or stop the engine at regular intervals and listen. Big ships cannot hear your signal, so you must hear theirs!
- Use the GPS with care.
- Proceed at a Safe speed This might not mean slowing down.
- Yes a safe speed in terms of collision, but also make it an easy
speed for you to calculate. If, for example, you are travelling at 4
knots, you cover 1 mile every 15 minutes. 3 knots is 1 mile every twenty
minutes. 6 knots is a mile every 10 minutes. They are easy, but try working
it quickly if you are making 5.3Knots. See what I'm getting at?
Don't forget though that the tide will also be on the move!
Accurate Timing like this is critical in fog. eg, If you are making 6 knots and it takes 10 minutes for the depth sounder to drop from one contour line to the next, the contours are 1 mile apart. Put your dividers between the contours and find the areas on the chart where they are a mile apart and you should be in one of those areas. - Aim off. If you aim straight at the target, run the distance and
don't find what you are looking for, which way do you go?
If you aim off to one side, then having run the distance, you know which way to turn.
It may well be that the harbour wall is a bigger target than the entrance and finding the wall, you can follow it to the entrance. - Mini Vectors.Normally you might not bother with a tidal vector (Course to Steer) over a distance of less than a mile because you can see if the tide is affecting you adversely. However, if the fog is down, vectors become crucial. It may well be that you are on a small area chart and it is not possible to plot a course to steer using the latitude scale as it is too big to plot. No matter; use any convenient sized scale (eg inches) to plot your vector, but remember it will only give you the correct course to steer and not your ETA!
Sound Signals that you will hear in restricted visibility and at other times are: -
Dit = One
short blast of a horn
Daah = One long blast of a horn
| Daah | - | A power driven vessel underway and making way |
|
Daah Dit Dit |
- · · |
One long and two short blasts. A vessel "manoeuvring with difficulty". All vessels "underway" except normal power driven vessels |
|
Daah Dit Dit |
- · · - · · · |
This is a tug and the last in the line of his tow. |
|
Daah Daah |
- - |
Means that the vessel is stopped |
|
Dit |
· |
Means I am about to alter course to starboard |
|
Dit Dit |
· · |
Means I am about to alter course to Port |
|
Dit Dit Dit |
· · · |
Means I am operating astern propulsion. (Trying to stop or going backwards) |
|
Dit Dit Dit Dit Dit |
· · · · · |
Means wake up, have you seen me, get out of the way! |
|
The rapid ringing of a bell for 5 seconds |
Means a small vessel at anchor (less than 100 meters) |
|
|
As above, but followed by a gong in the stern |
Big ships at anchor (over 100 meters) |
|
|
Dit Daah Dit |
· - · |
May also be sounded by anchored vessels |
| Three strokes on a bell, rapid ringing for five seconds, then three strokes on a bell | ding
ding ding
ding ding ding |
This vessel is aground |
Pilot vessels sound four short blasts in restricted vis. So if you ever need one, that's how to find him.
This last module is a huge one and I could go on with it ad infinite, but I
think we have covered the basics.
And finally …
I hope you are not scared to death to go sailing again after all this talk
of gloom and doom!
Most of the above never happens if you and your crew are well prepared,
(trained and briefed) knowledgeable and use
a fair amount of common sense.
Good sailing!